![]()
This blog entry is a follow up to my previous post explaining how to setup continuous integration and continuous deploying for a Angular 5 application using Azure Devops. In the previous blog, I used GrenitausConsulting.com as the example. In this blog post I will walk you through how I setup continuous integration and continuous for Blog.Michaeldeongreen.com using Azure Devops, which was much more complicated.
Caveats!
First, if you are not familiar with the design of Blog.Michaeldeongreen.com, I suggest you read the 3 part series I wrote, explaining all of the components before reading this blog entry. Also, if you are not familiar with Azure DevOps, please look at my previous blog for details.
Also, I assume that you are familiar with:
- Angular 5+
- angular-cli
- .Net Core
- Azure Portal
- GitHub
- Node Package Manager
Challenges!
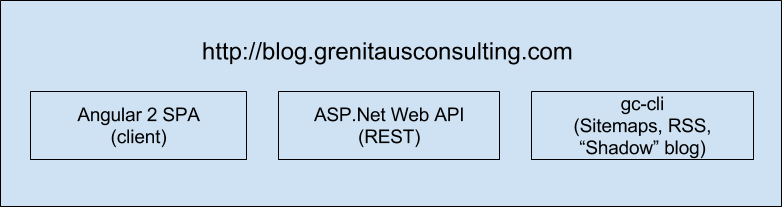
Blog.Michaeldeongreen.com has 3 basic components:
- Angular 5 Front-End - Web Client that serves up blog pages.ASP.Net Core REST API - Back-end Server that exposes an API that serves up blog data. gc-cli - Command Line Interface used to generate sitemaps, rss feeds and static web pages to assist with SEO.
When I created my blogging software, I was in a bit of a hurry and since I don’t have an SSL Certificate (currently researching letsencrypt), I never made an Admin Page. So to add a new blog, tag, quote etc etc, the steps are:
- 1 - Update JSON Config Files in the Visual Studio Project with new Blog, Tags, Quotes
- 2 - Run gc-cli, which will look at the JSON Config Files and generate sitemap, rss and static pages for angular-cli to add to the “dist” folder
- 3 - Build and Publish REST API
- 4 - Build and Publish Angular Application
- 5 - FTP the published files to Azure
Steps 1-4 are automated via Bash Scripts but Step 5, I do manually.
So the first item I had to take care of is modifying gc-cli to be 100% command line driven. Prior to making the changes, gc-cli accepted 2 arguments, build and what environment ie “gc-cli.exe build -prod”. It would use the environment argument to determine which appsettings.json file to use ie “appsetttings.Development.json” or “appsetttings.Production.json”.
The appsettings.json files tell gc-cli what REST API url to use, where REST API JSON Config files are located and where to output static pages, sitemap and rss information. Now, I wanted to make gc-cli more cloud native by having these values passed in as parameters.
Also, when gc-cli wants to display information to the console, I used the Console object but decided to swap it out for ILogger and write to the Console in Azure DevOps. You can view my gc-cli code here.
Azure DevOps!
Once I made the necessary changes to gc-cli, I was basically ready to setup my Azure Devops Project. I created my new Project, setup my GitHub connection and now I am ready to configure my Azure DevOps Build Agent.
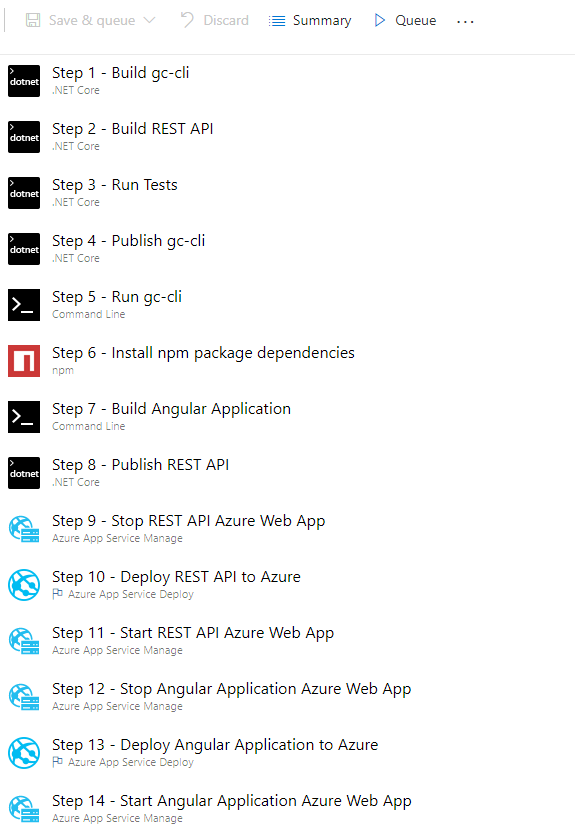
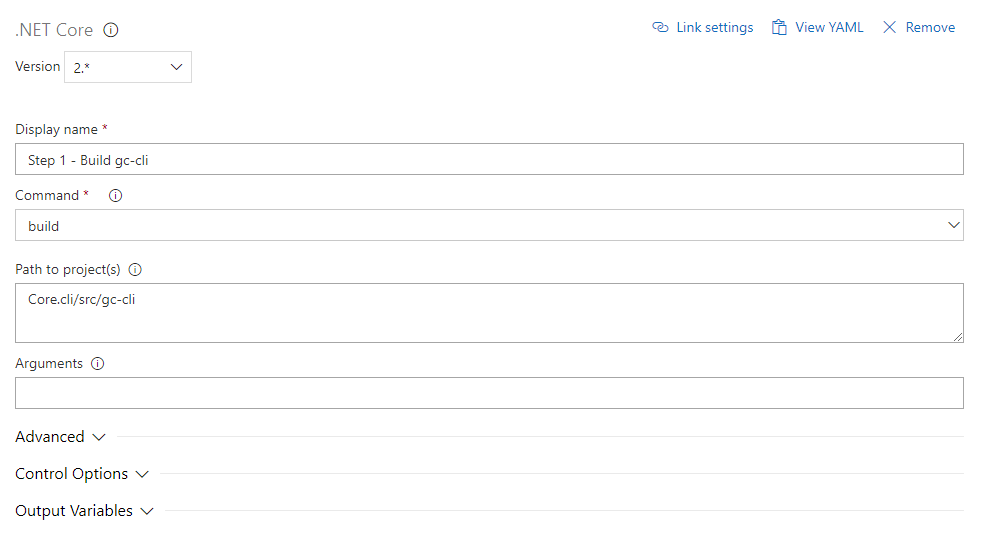
First, I needed to Build gc-cli. So I chose a .NET Core Task:
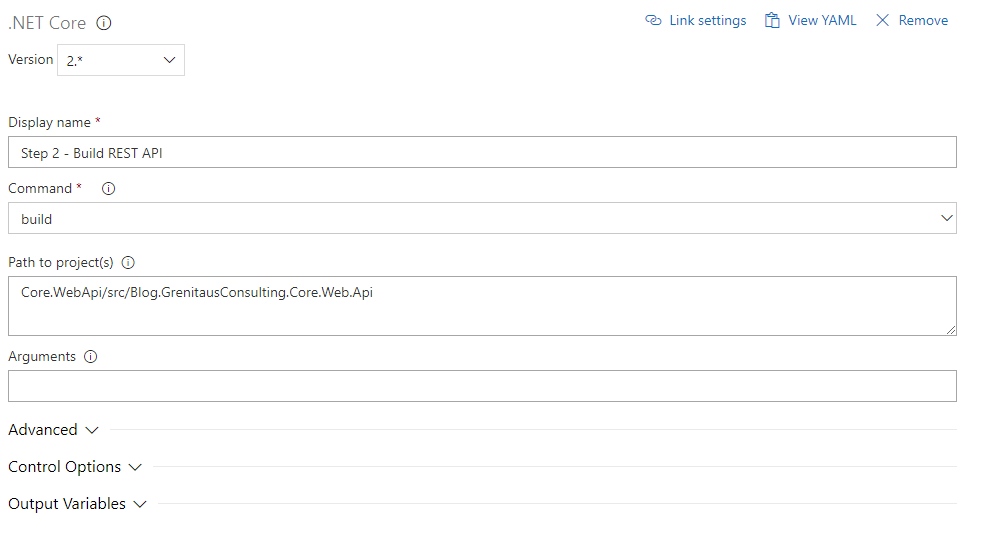
Next, I needed to build my REST API. So, I chose a .NET Core Task:
After this was done, I needed to run my Unit Tests. So, I chose a .NET Core Task:

Once this has been done, I needed to create a gc-cli executable as by default a .NET Core Console application creates a DLL. So again, I created a .NET Core Task:
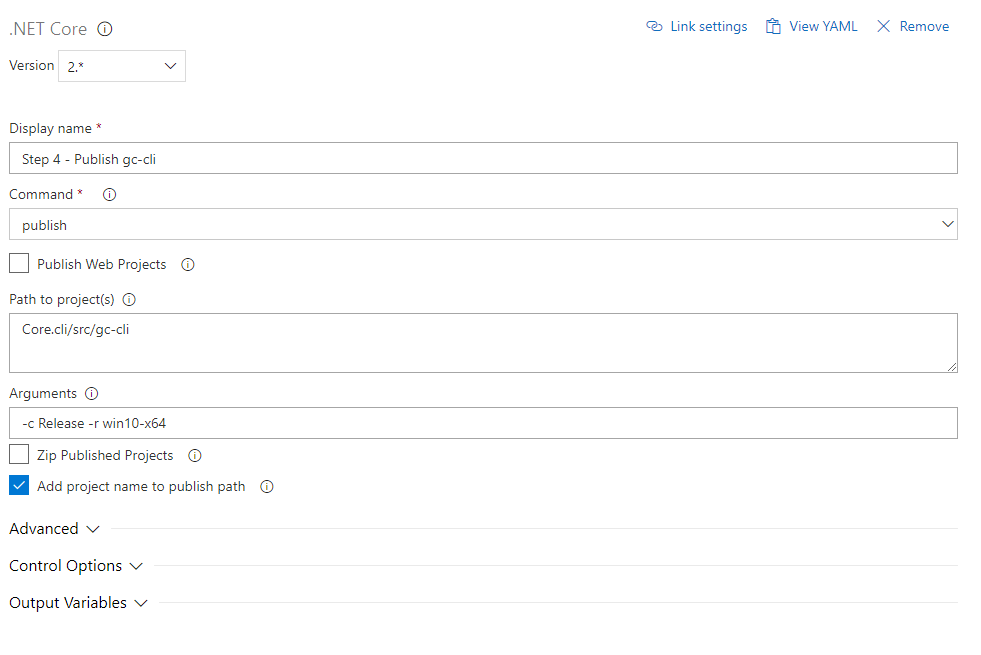
Once the gc-cli Executable had been created, I needed to create Variables to pass to gc-cli as Command Line Arguments parameters. I did this by going to the Variables tab:

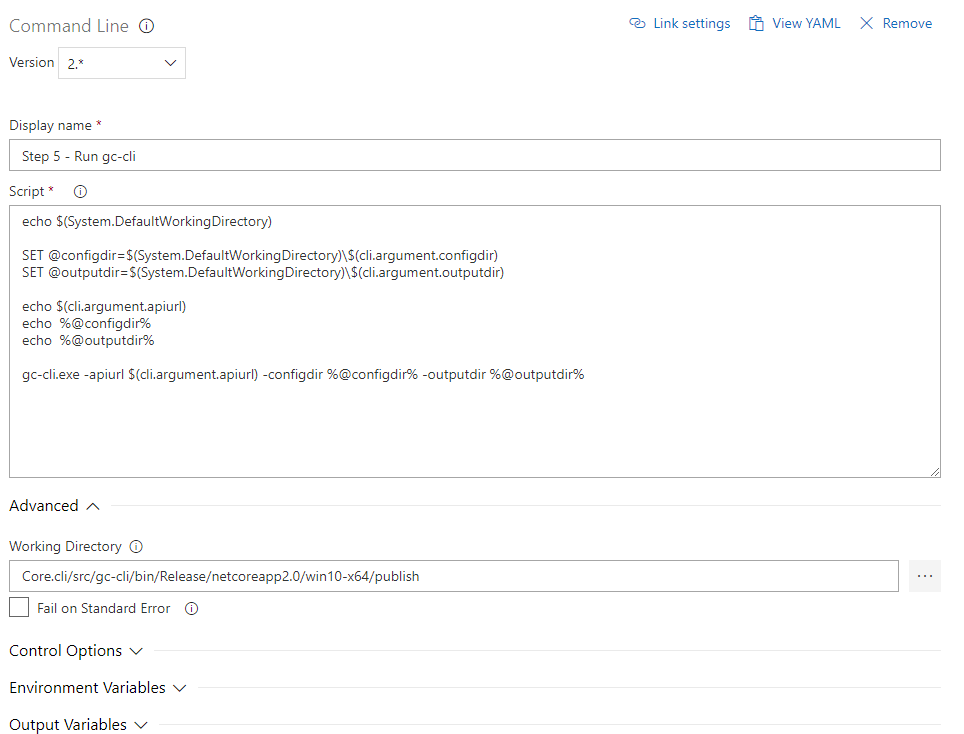
Next, I created a Command Line Task so I can call the gc-cli executable and pass the Variables as parameters:
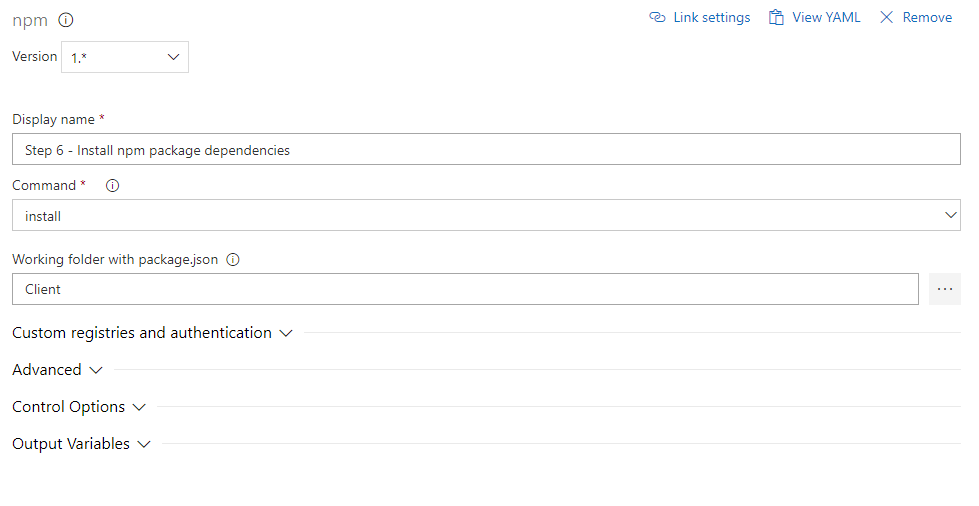
Next, I needed to restore node package dependencies for the Client. To do this, I created a npm Task:
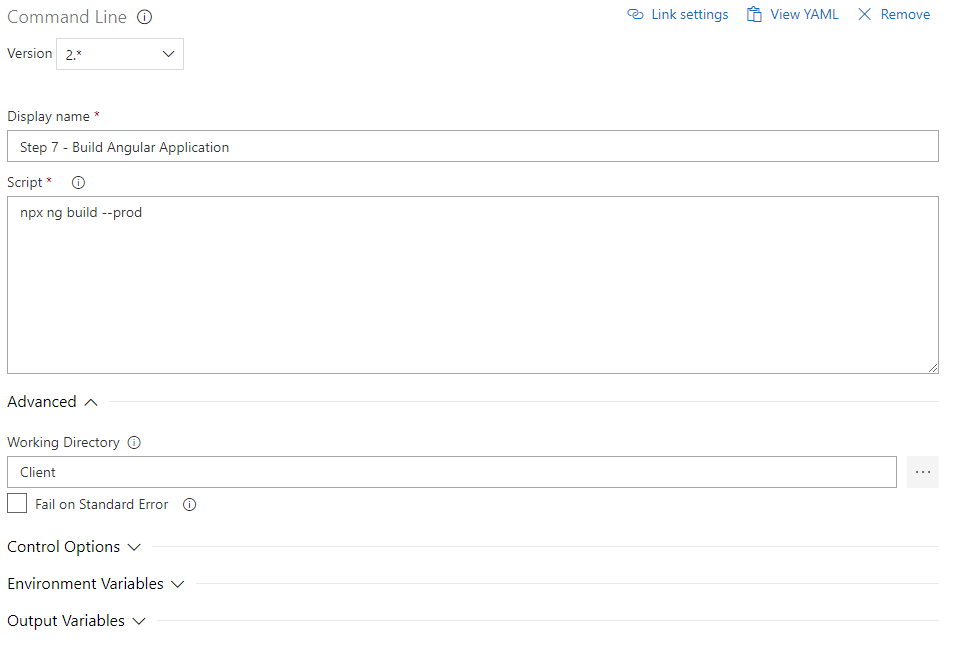
After this is done, it is time to build the Angular 5 Client and create the publish files. Again, I created a Command Line Task:
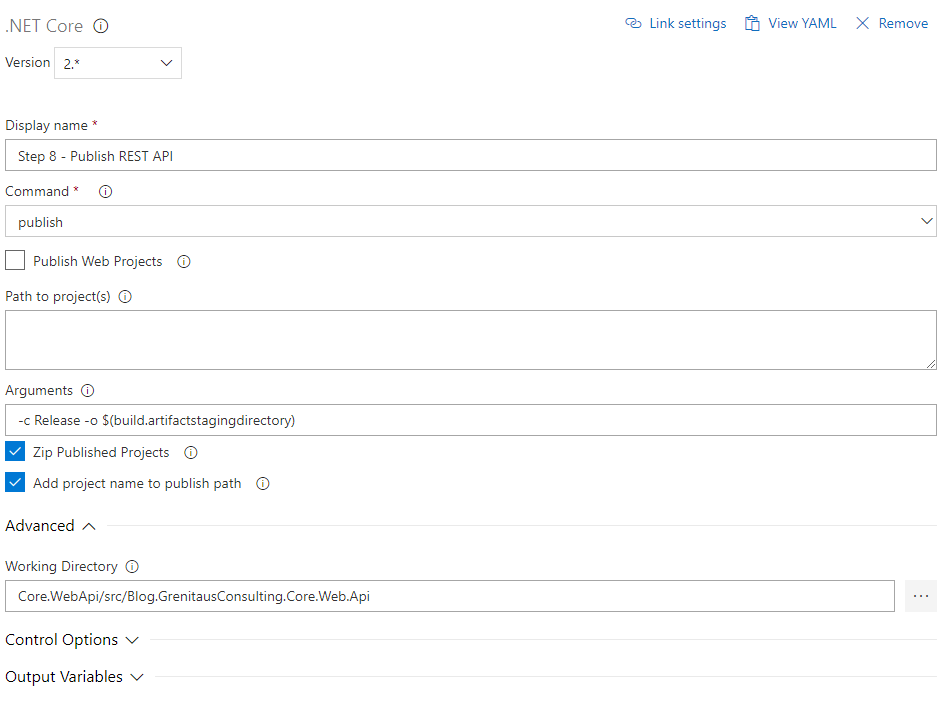
Now it is time to publish the REST API files. I used a .NET Core Task to accomplish this:
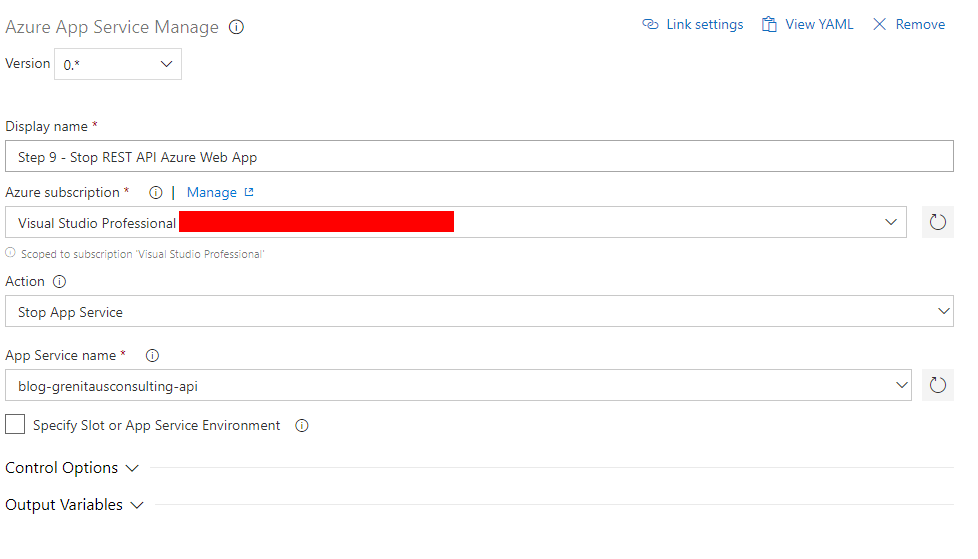
Now it is time to start publishing to Azure. However, when I used an Azure App Service Deploy Task, I would get an error like:

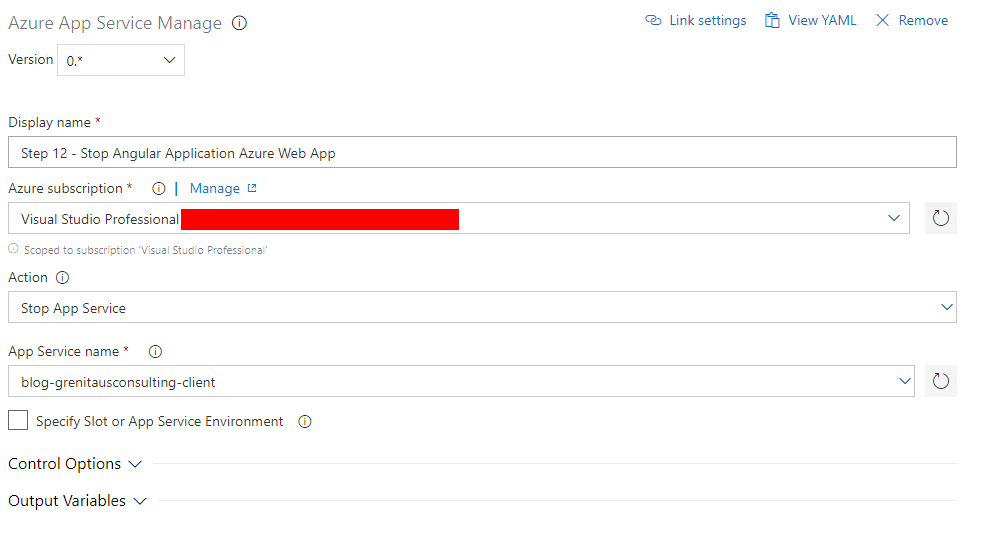
What I realized is that I needed to Stop the App Service before I deployed the App Service. To do this, I created a Azure App Service Manage Task:
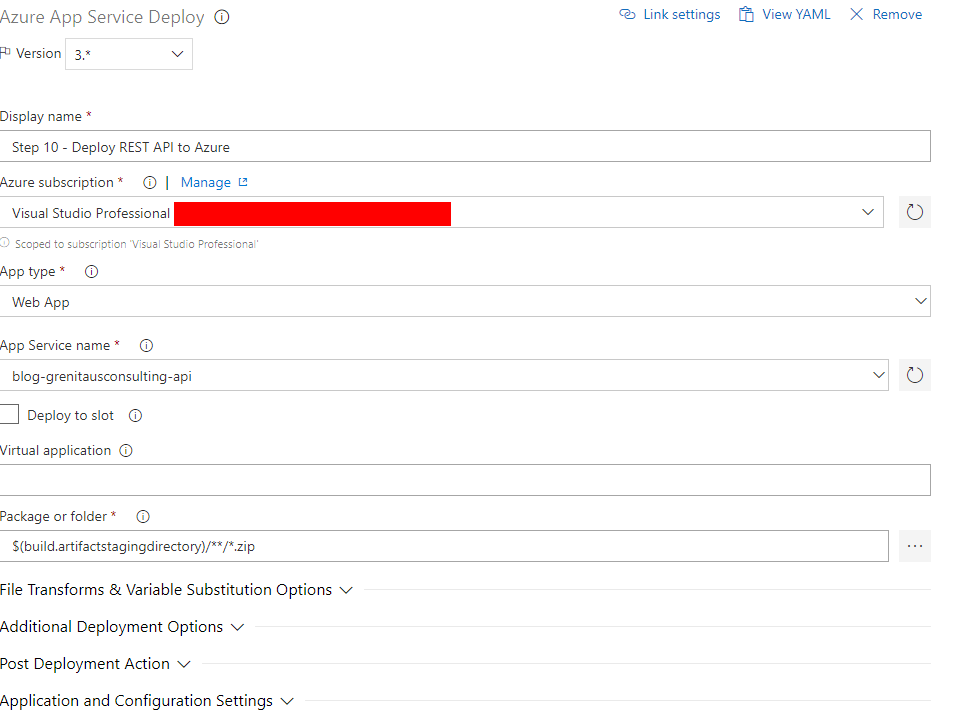
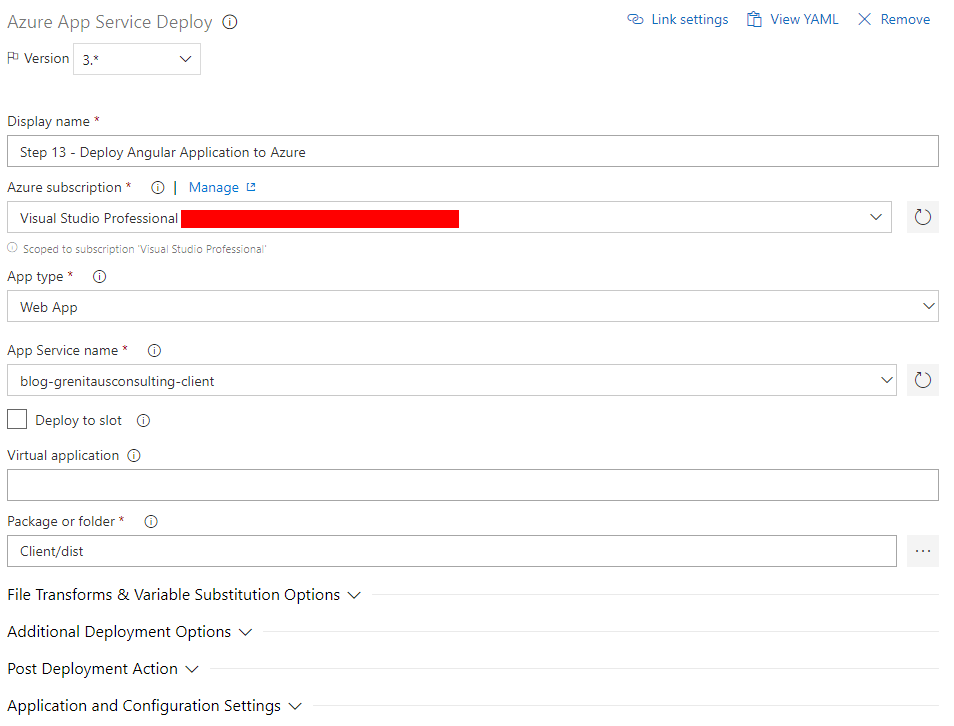
Now that I have the App Service stopped, I can deploy and I do that with a Azure App Service Deploy Task:
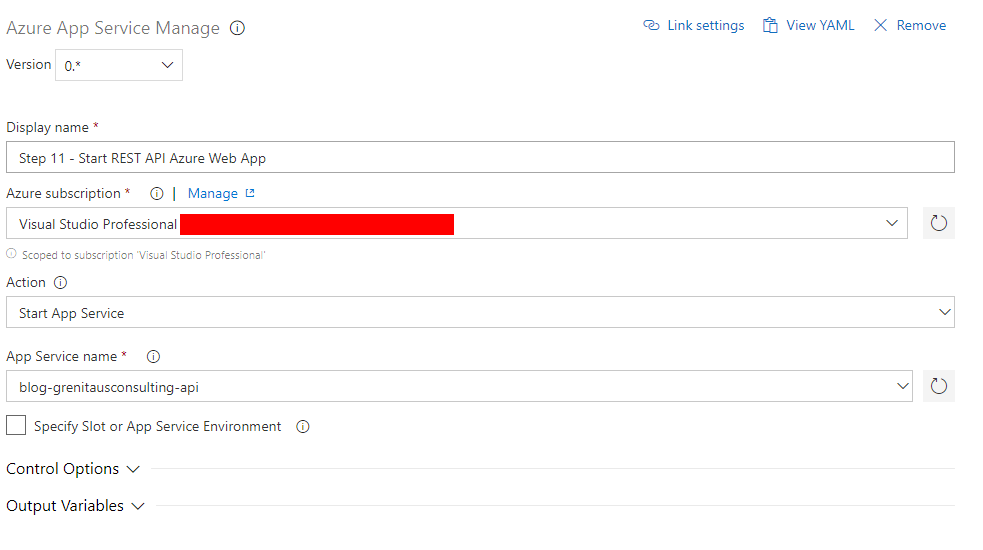
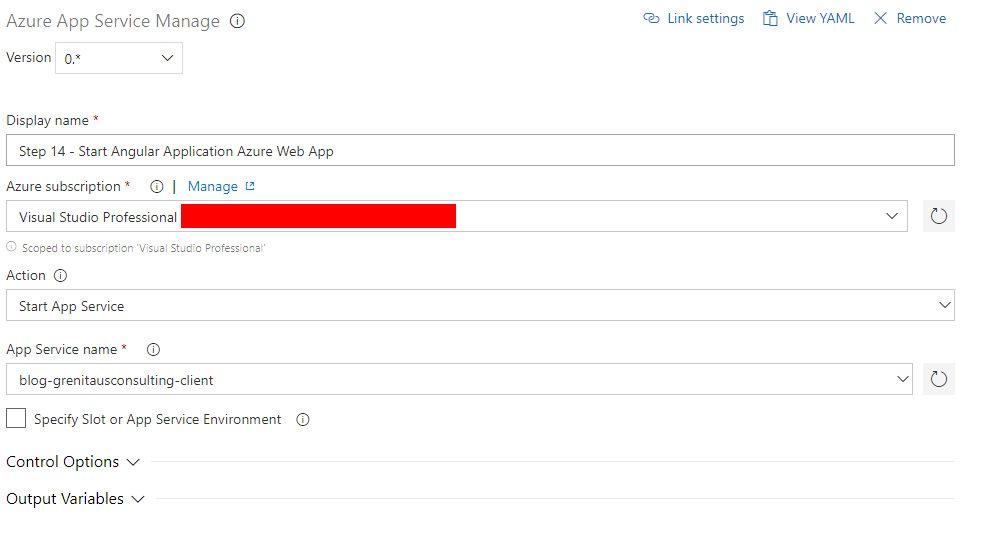
After the App Service is deployed, I need to restart the App Service and I did this by making a Azure App Service Manage:
 Next, I need to do the same exact steps for the Angular 5 Application ie Stop Service, Deploy Service and Restart Service:
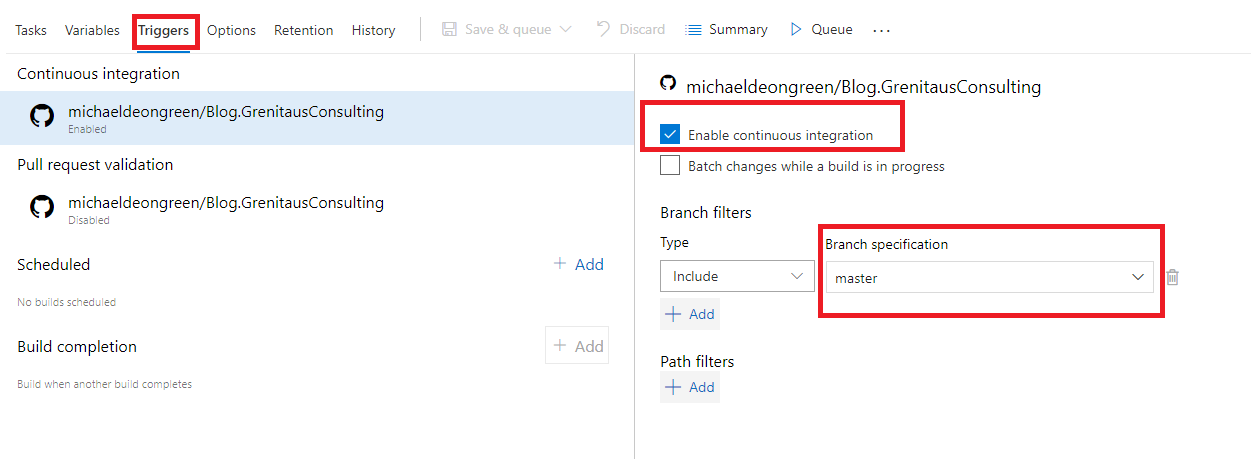
Last, I need to Trigger CI & CD on check-in to the master branch and enable continuous integration:
Here is an overview of all of my steps: