![]()
At one our Client Partners here at Microsoft, we are using the Azure EventGrid to power our event driven application written in ASP.Net Core. In this blog, I wanted to take a moment to demonstrate how to locally debug a ASP.Net Core Web API that receives messages from Azure EventGrid.
In this tutorial, I will demonstrate how to debug a ASP.Net Core Web API endpoint that receives messages when a new blob is created in an Azure Blob Storage Account. The code used in this tutorial can be found here
Pre-requisites!
- .Net Core 2.2
- An Azure Subscription
- azure-cli
- Git
- Visual Studio Code
Note: Before running any of the commands, always ensure you have logged into azure by executing the following command:
az login
ngrok
First, we need to donwload a tool called ngrok. Once you create an account, following the instructions on how to register your authtoken.
Register the Azure EventGrid Provider
If not already registered, we will need to register the Azure EventGrid. Open up a terminal and run the following command.
az provider show --namespace Microsoft.EventGrid --query "registrationState"
Create Azure Blog Storage Account
We will clone the sample application and navigate to the scripts folder and execute the following command to create our Azure Blog Storage Account and a Blob container called demo:
    chmod +x create-az-storage-account.sh &&
    ./create-az-storage-account.sh -r {name_of_resource_group} -l {location} -a {name_of_blob_storage_account}
If the script ran successfully, it will return back the message The script has created the Azure Resources.
Debugging!
Open up the ASP.Net Core Web API project in Visual Studio Code and press F5 to run the project. A quick note, for Ubuntu, I had to modify the launchSettings.json file to use http to allow ngrok to work.
In the EventGridController, place breakpoints in various places to debug the application when a message is received from Azure EventGrid.
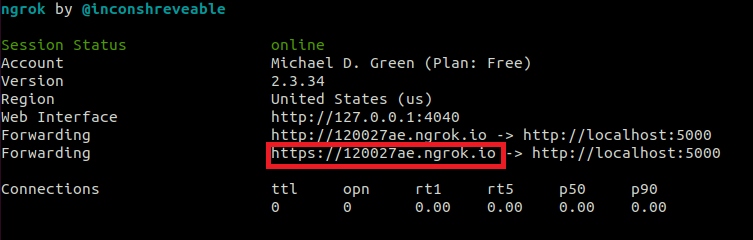
Next, we need to run ngrok. We do this by executing the command below: (note: for Windows user, you need to use the command prompt as I could not get git bash to work).
ngrok http -host-header=localhost 5000
Next, we will need to copy the generated url so we can use it to subscribe to events via Azure EventGrid.
Next, we need to navigate to the Azure Portal to create the Subscription and upload a file, so we can debug the application.
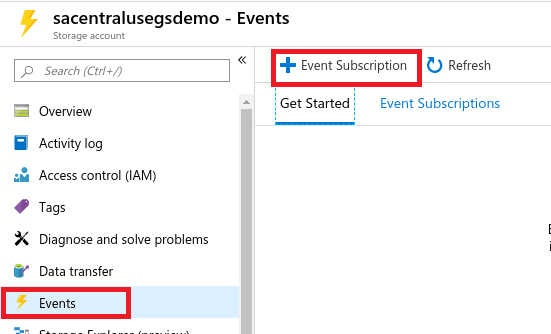
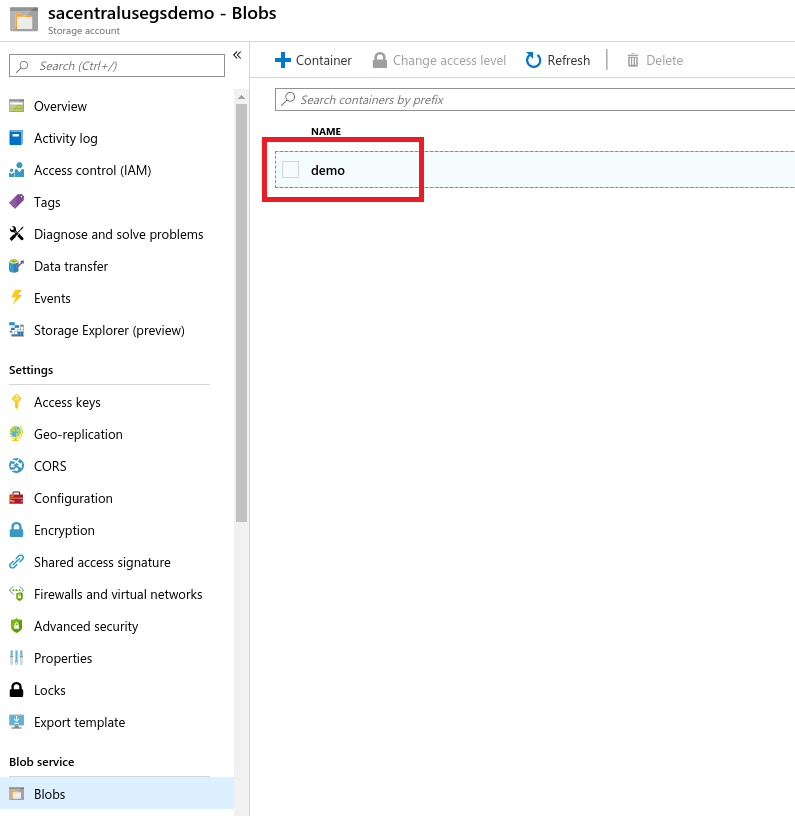
In the Azure Portal, we need to find the Azure Blob Storage Account we created when we ran the create-az-storage-account.sh bash script. Select “Events” and then “Event Subscription”.
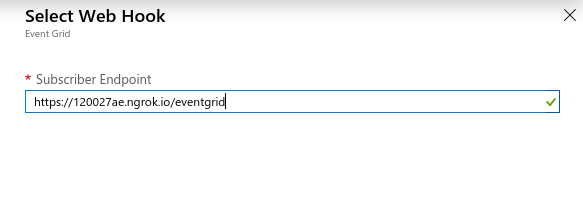
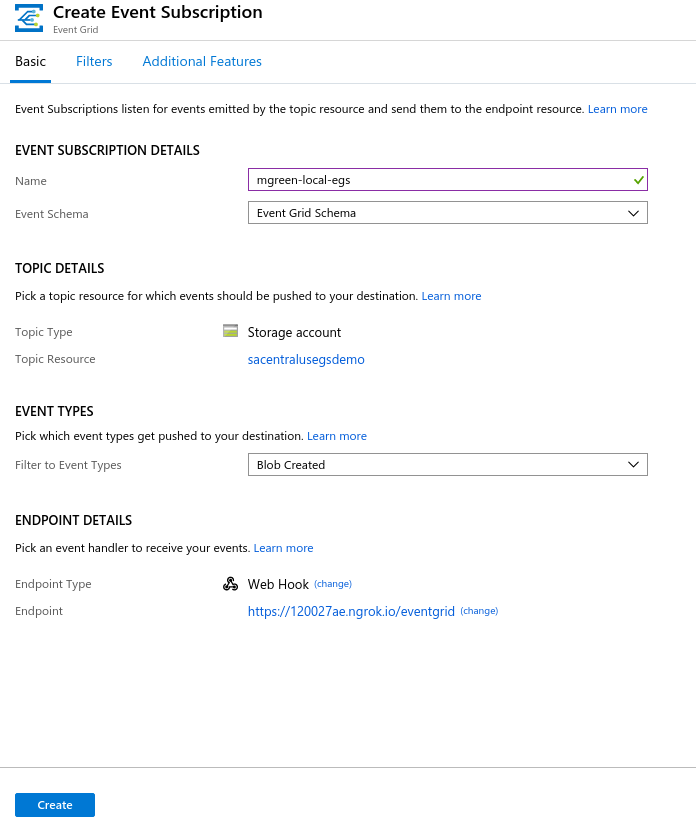
For the Endpoint Type, we will choose “webhook” and copy the url ngork generated and add “/eventgrid” to the end ie https://ngrok-url/eventgrid. See the images below for guidance:
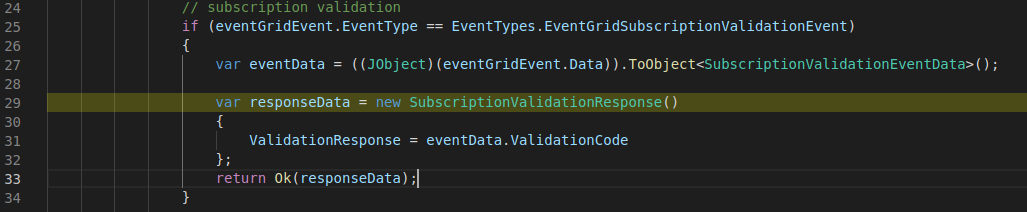
When we hit the create button to create the Subscription, for security reasons, Azure EventGrid will validate the endpoint and if you have a breakpoint similar to the picture below, the breakpoint should be activated in Visual Studio Code:
Also, the new Subscription should be displayed on the Events page of the Azure Blob Storage Account:

Now let’s upload a file and debug the HandleEventGridEventAsync Method inside of the EventGridController (make sure you have a breakpoint in the HandleEventGridEventAsync method).
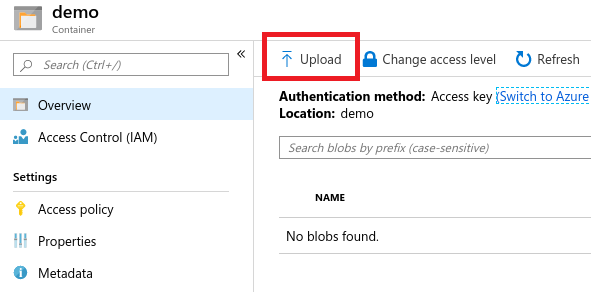
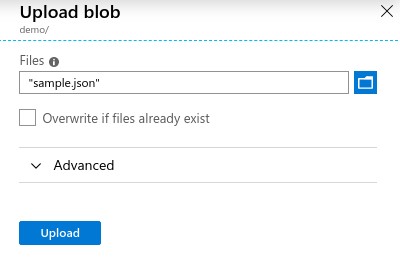
In the Azure Portal, we need to find the Azure Blog Storage Account and navigate to the demo container. Inside of the container, we will press the upload button. Included in the Git repository root directory is a file called sample.json, you can choose this file or a file of your own choosing. For guidance, see the pictures below:
Once the file is finished uploading, our breakpoint should be activated in Visual Studio Code:

Clean Up!
Now that we are finished, we can run the delete-az-storage-account.sh bash script to clean up our resources. Run the following command:
        chmod +x delete-az-storage-account.sh &&
        ./delete-az-storage-account.sh -r {name_of_resource_group}
If the script ran successfully, it will return back the message The script has deleted the Azure Resources.