
On one of my projects, I recently had to schedule a task to run in specific intervals. My current client was an early adopter of Azure and all of their applications are in the Azure Cloud. After finding out that a SQL Server Agent was not available for SQL Azure, I eventually turned to an Azure WebJob. I wanted to take a moment to write a blog about how to create, configure, deploy and stop an Azure WebJob because I felt these tasks were not intuitive. When I am unfamiliar with a technology, I like to “test it out” by creating a sample application that does a very basic job but one that is similar to what I will need it to do in Production.
I created a Azure WebJob that is scheduled to run in 30 second intervals and will insert a record into an SQL Azure Table using Fluent NHibernate. You can find the code on GitHub here
Tools Used?
- Azure Portal
- Azure WebJob
- C#
- Fluent NHibernate
- SQL Azure
- SQL Server Management Studio
- Visual Studio 2015
Assumptions!
You are familiar with and have access to:
- C#
- Fluent NHibernate
- SQL Azure
- SQL Server Management Studio
- The Azure Portal
Azure Portal - Round 1
The first task was to create a SQL Azure Database. Log into the Azure Portal, Select SQL databases and add a new Database. I called my Database “Employee”. I created a new Database Server for this database, so I filled out the Database Server information and made note of the Database Server username and password.
Next, I created an Azure Storage Account for my local environment. When creating the Storage Account, I made sure to choose the “classic” deployment model: 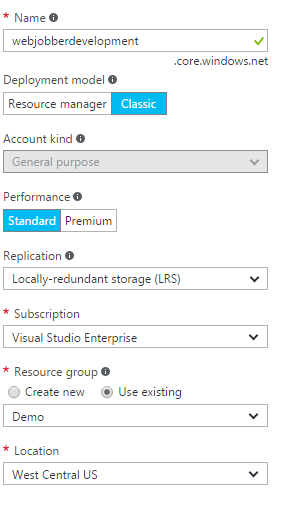
Visual Studio 2015 & Fluent NHibernate
Once I had created my initial Azure artifacts, it was time to open up Visual Studio and create my WebJob.
In Visual Studio, I created a new project and under Cloud, chose Azure WebJob: 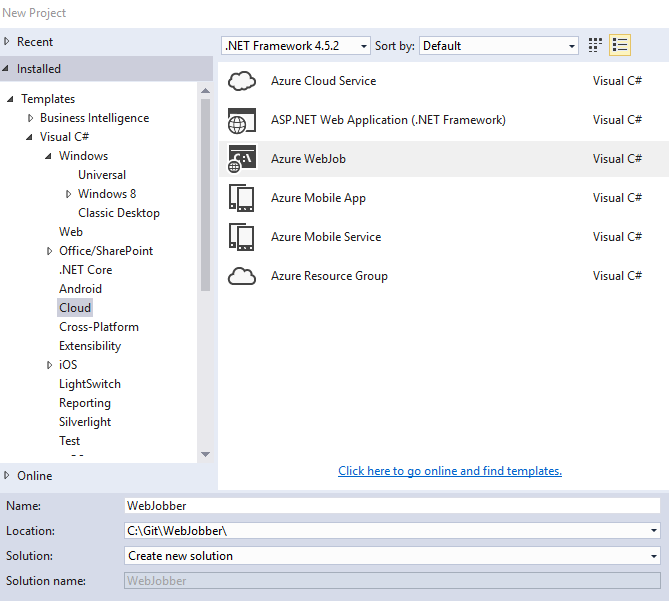
After my WebJob had been created, opened up the NuGet Package Manager and installed the Microsoft.Azure.WebJobs.Extensions package. The Microsoft.Azure.WebJobs.Extensions NuGet Package allowed me to use the “TimerTrigger” to use cron expressions to schedule a function to be called in specified intervals.
Install-Package Microsoft.Azure.WebJobs.Extensions
After installing Microsoft.Azure.WebJobs.Extensions NuGet Package, I created 2 Class Libraries, one that contains my “Domain” objects and another library that contains my business logic. Below is my project structure: 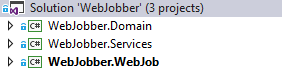
After this, I installed Fluent NHibernate in the Domain and Services Class Libraries. I chose Fluent NHibernate because this is what is currently being used on my project and I like to use similar tools in my sample applications.
Install-Package FluentNHibernate
Next, I opened up SQL Server Management Studio and in the Employee Database, created a table called “SomeJob” with two fields, one called “Id: that is an int and another called “Name” and is an nvarchar(50).
In the “Domain” class library, I created 3 classes:
NHibernateSession Class - This class is to configure Fluent NHibernate to connect to my SQL Azure Database:
            private static ISessionFactory _sessionFactory;
            private static ISessionFactory SessionFactory
            {
                get
                {
                    if (_sessionFactory == null)
                    {
                        _sessionFactory = Fluently.Configure()
                        .Database(MsSqlConfiguration.MsSql2008
                        .ConnectionString("someconnectionstring"))
                        .Mappings(m => m.FluentMappings.AddFromAssemblyOf())
                        .ExposeConfiguration(config =>
                        {
                            SchemaExport schemaExport = new SchemaExport(config);
                        })
                        .BuildSessionFactory();
                    }
                    return _sessionFactory;
                }
            }
            public static ISession OpenSession()
            {
                return SessionFactory.OpenSession();
            }
’
SomeJob Class - This class is a code-first representation of the SomeJob Table:
        public class SomeJob
        {
            public virtual int Id { get; set; }
            public virtual string Name{ get; set; }
        }

SomeJobMap Class - This class is used to tell Fluent NHibernate how the SomeJob class maps to the SomeJob Table:

        public class SomeJobMap : ClassMap
        {
            public SomeJobMap()
            {
                Id(j => j.Id).UnsavedValue(0);
                Map(j => j.Name).Nullable();
            }
        }

In my Services class library, I created 1 class:

SomeJobService Class - This class has a simple Save Method to save a new Job to the Database:

        public class SomeJobService
        {
            public void Save(SomeJob job)
            {
                using (ISession session = NHibernateSession.OpenSession())
                {
                    session.SaveOrUpdate(job);
                }
            }
        }
Configuring The WebJob
When you create the WebJob, it will create a class called Functions.cs and will some base code in the Program.cs.
In the Program Class, I modified it (see comments):
        class Program
        {
            static void Main()
            {
                var config = new JobHostConfiguration();

                if (config.IsDevelopment)
                {
                    config.UseDevelopmentSettings();
                }

                config.UseTimers(); //added this line so the framework will schedule my custom function

                var host = new JobHost(config); //modified this line to pass the JobHostConfiguration to the JobHost
                host.RunAndBlock();
            }
        }
In Functions.cs, I delete the ProcessQueueMessage Method that was generated and I placed my custom function here. When I first created my sample project, my function was in the Program Class as I didn’t know that it had to be in the Functions Class:
        public class Functions
        {
           public static void TimerJob([TimerTrigger("00:01:00")] TimerInfo timer, TextWriter log)
            {
                new SomeJobService().Save(new SomeJob() { Name = "Fred Shuttlesworth"});
                log.WriteLine("Inserted new record into SomeJob Table...");

            }
        }
In the code above, I am passing in a TimerTrigger and I have configured the cron expression to run this function every 1 minute. When this function is called, a new record will be inserted into the SomeJob Table in SQL Azure
Before we can run this application, we have to set the two Storage Account connection strings. In app.config, there will be two default connection strings, one called “AzureWebJobsDashboard” and the other called “AzureWebJobsStorage”. Since this is a test project, I am going to use the Storage Account I created earlier for both.
To find the connection string value, you would go to the Azure Portal, select the Storage Account I created, select Access Keys and under PRIMARY CONNECTION STRING, copied this value and pasted it in the connectionString for both Storage Account connection strings in the app.config.
Now we are ready to run the application locally to make sure everything works. When you run the WebJob locally, you should see something like:
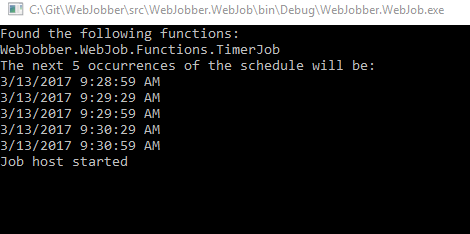
This initial output displays the 5 intervals in the future in which the WebJob will run. When the function is called, you will see something like:

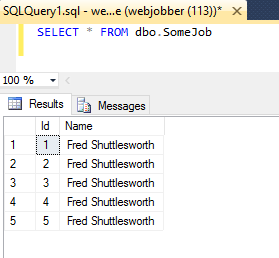
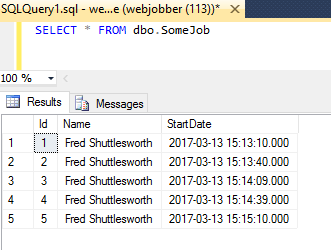
Now, when I check the SomeJob Table, I should see records:
Deploying the WebJob
Now that I observed that the WebJob was running locally, it was time to deploy it to Azure. To deploy the WebJob you do the following:
In Visual Studio, right-click on the WebJob Project and select “Publish as Azure WebJob”
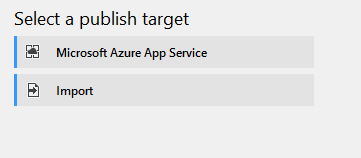
On the first menu, choose “Microsoft Azure App Service”:
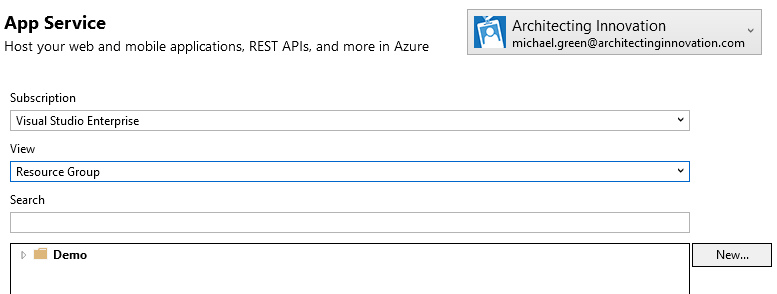
On the next screen, choose your Azure Subscription, under View, select “Resource Group” and press the “New” button:
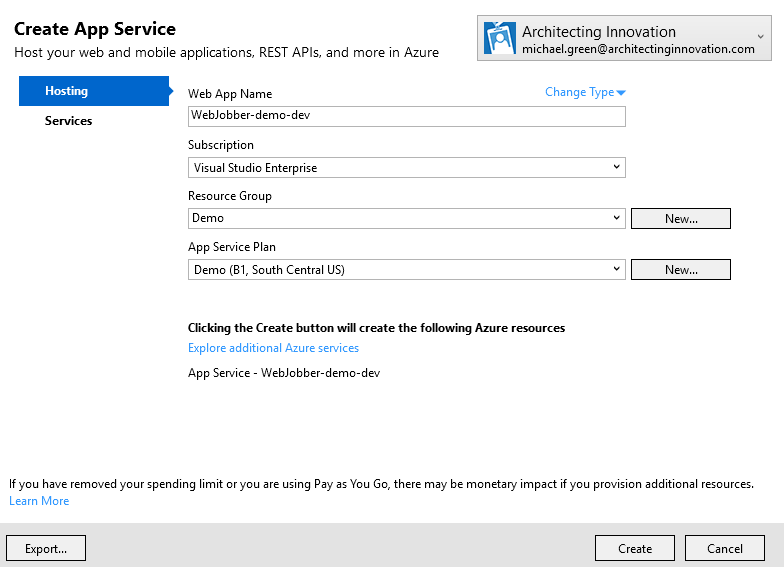
On this screen, enter a name for your new Web App, Subscription and choose/create your Resource Group, App Service Plan and press the “Create” button:
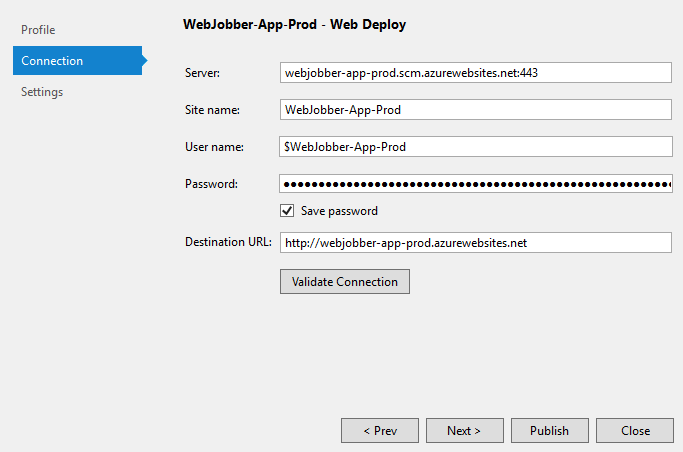
On the Connection Screen, just press “Next”:
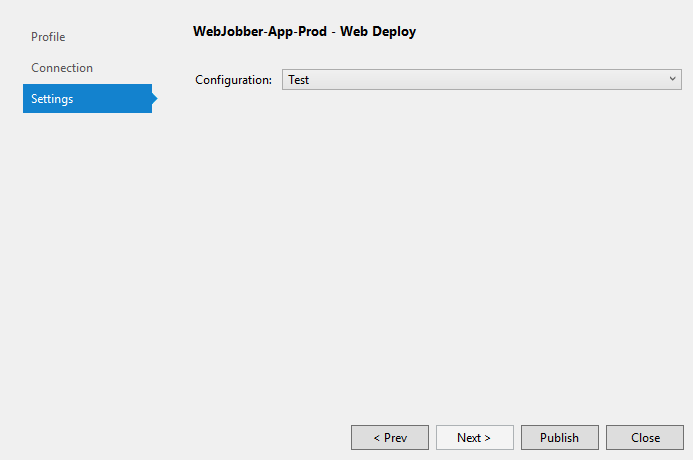
On the Settings Screen, just press “Publish”:
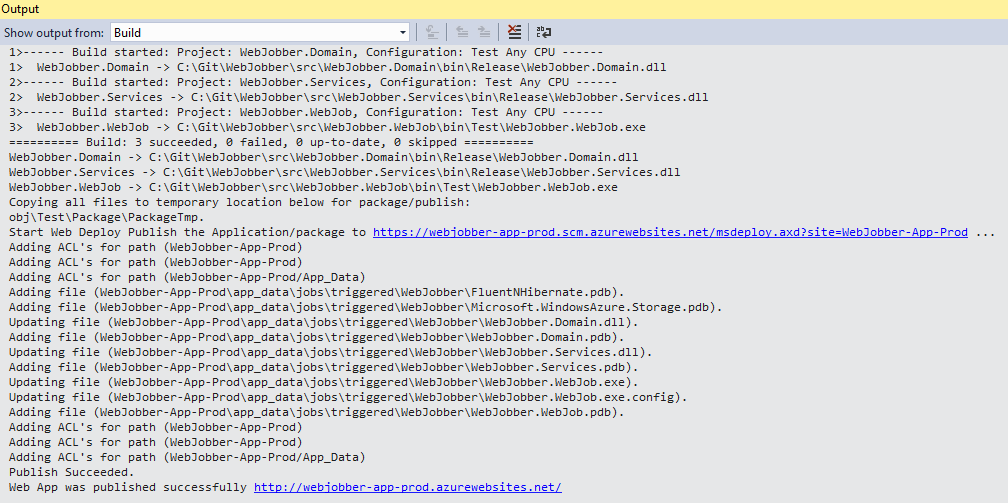
Once Visual Studio is finished publishing the WebJob, the output should look similar to the below:
To make absolutely sure that the records that are inserted into the SomeJob Table comes from my WebJob now deployed (it isn’t running yet, just deployed) to Azure, I delete all the current records in the SomeJob Table.
DELETE FROM dbo.SomeJob
Azure Portal - Round 2
To start my WebJob without any issues, I had to do the following in the Azure Portal:
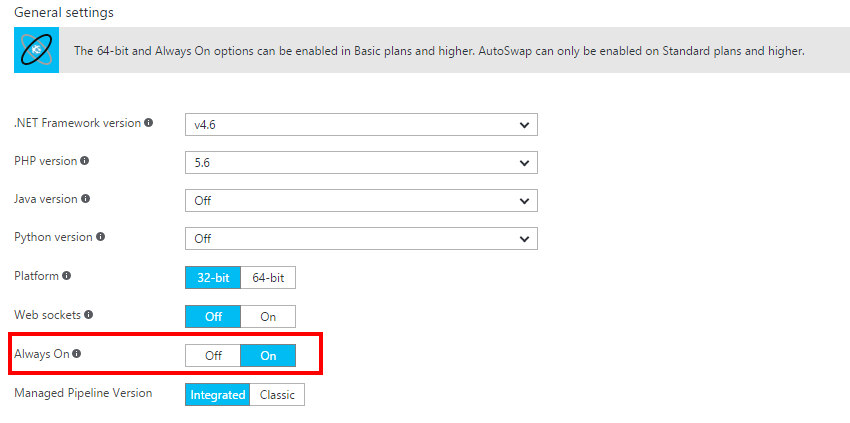
First, to prevent the App Pool from going to sleep after receiving no requests in a given time period, I selected the new Web App I had just created, in Application settings, under General Settings, I choose “Always On”:
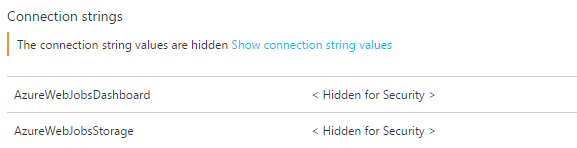
When I first attempted to run a WebJob, there were errors because it could not find the Storage Account connection strings, despite me FTP’ing into the machine the WebJob was deployed too and the values being in the app.config. To resolve the issue, in the Application Settings for the new Web App, under Connection strings, I entered both Storage Account connection string name/value pairs that are in the app.config.
After this, in the blade for the Web App, I navigated to WebJobs, selected the WebJob I had just deployed and pressed the “Run” button:
Next, I hit the “Log” button to view the log activity of the WebJob:
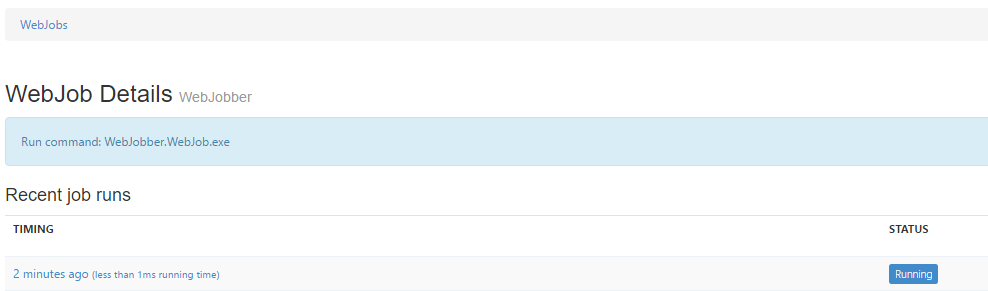
On this screen, you can drill down to view more detail about the WebJob by selecting one of the links on the page:
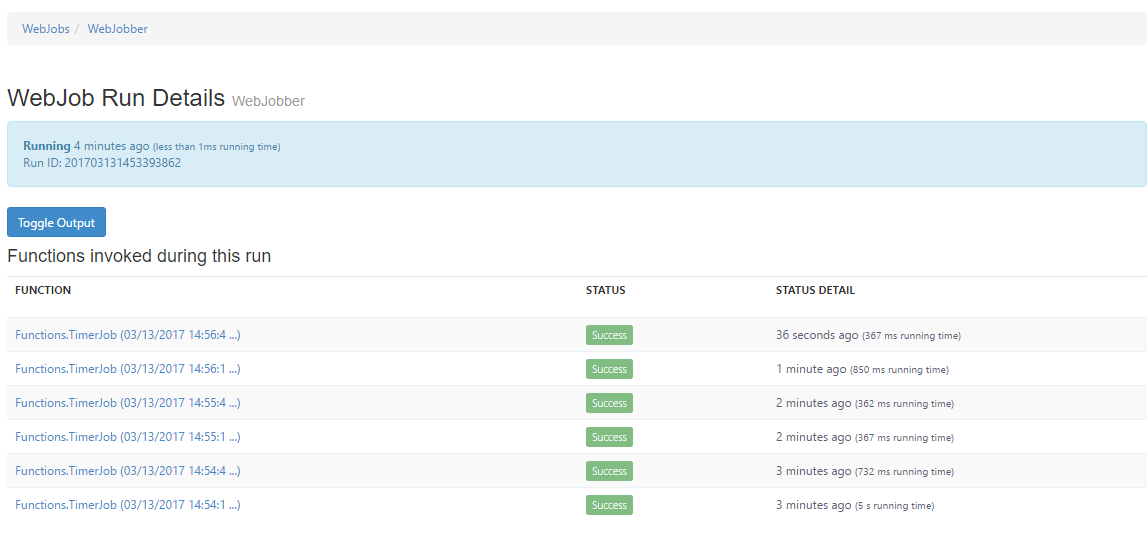
On this screen, hit the “Toggle Output” button to view the same information that I would see in the console window when I was running the WebJob locally:
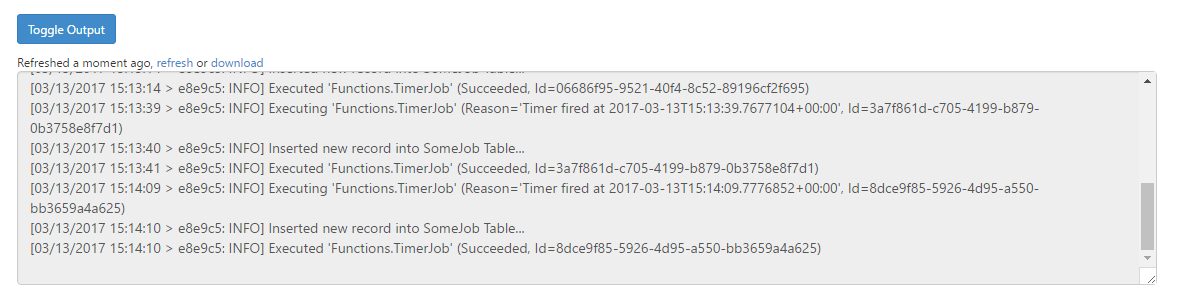
After I did this, I observed that my SomeJob Table was indeed being populated with data roughly every minute as expected.
Stopping the WebJob
Edit:After this blog was created, Microsoft implemented a stop button in the Azure WebJob GUI. The section below is still relevant if you want to know how to use the Azure WebJob Process Explorer.
Once I had deployed my first WebJob, my next question was how do I stop it. There didn’t seem to be any GUI that would allow me to just stop the WebJob. I made a small code change to make the output print a certain message, re-deployed and the changes were not reflected on the Log screens. More troubling is that when I stopped the Web App, the WebJob continued to run. Not knowing any better, I decided to go with the nuclear option and just delete the WebJob. When I did this, I faced a few issues, one being, I had trouble re-starting the WebJob, once I had made changes and another issue, which I will talk about later, caused another major issue.
Eventually, I found a wonderful post on the MSDN Forums about the “Process Explorer”, which shows you all the process running for a particular Web App and more importantly, the ability to kill a process. You can get to your Web App’s Process Explorer by typing in the following:
https://{sitename}.scm.azurewebsites.net/ProcessExplorer
The screen should look like the below:
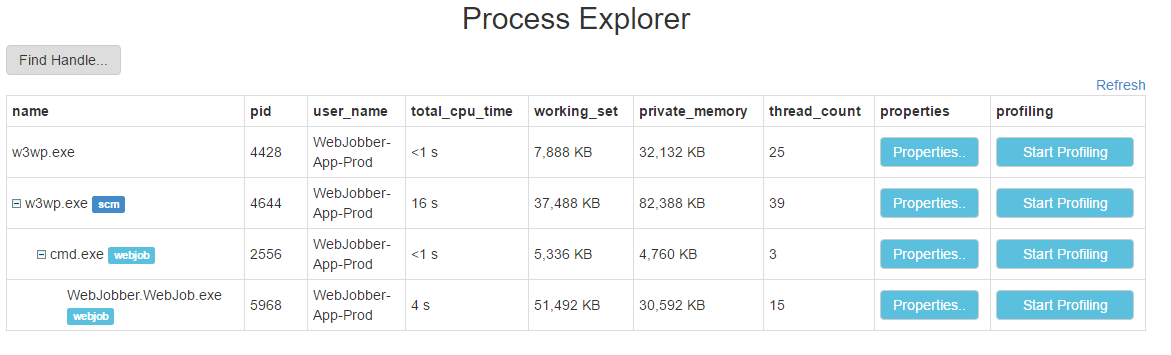
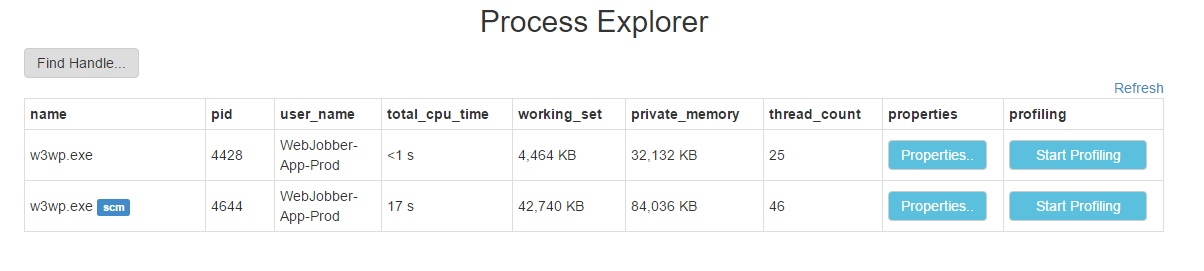
To kill my WebJob, I pressed the “Properties” button on the row that contained my WebJob process, in this case “WebJobber.WebJob.exe” and in the popup, navigated to the bottom and pressed the “kill” button. After I did this, the Process Explorer refreshed and my process was no longer there.
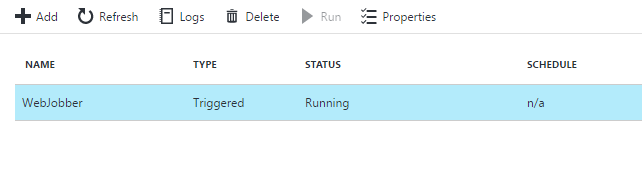
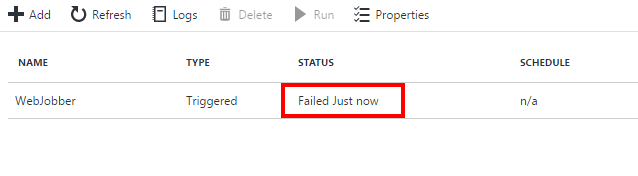
When I went back to the WebJob under the WebJobs section of the Web App, I observed the following:
Re-deploying the WebJob
Now that the WebJob had been stopped, I wanted to make a small change and re-deploy. In SQL Server Management Studio, I added a new date field to my SomeJob Table, updated the SomeJob and SomeJobMap classes to reflect this change.
Once I had observed the changes were working locally, I repeated the same process I spoke of earlier to deploy the WebJob to Azure. Once deployment was complete, I went back to the Azure Portal, selected the Web App and under WebJobs, restarted the WebJob and observed that the SomeJob Table was indeed being populated:
Possible Gotchas and Issues
If you are going to use TimerTrigger Functions to schedule tasks, you probably want to have a Storage Account per environment, including local. If you use the same Storage Account for multiple environments ie Local, Development, Test or Prod, the instance of the WebJob running in those environments will compete with each other for access to the Storage Account. You can find out more about TimmerTriggers here.
Also, another issue I faced when my Local and Test Environment shared the same Storage Account was that when I didn’t know how to stop a WebJob and opted to just delete it in Azure, for some reason, my Local instance in Visual Studio would no longer run. I suspect that some type of Lock was placed on the Storage Account and because I deleted the WebJob, it was never released and therefore, my local instance could no longer access the Storage Account. It was only when I created a new Storage Account for my Local environment that my Local instance would start to work again.
Another issue that I faced is that I couldn’t get App.Config Transformations to work using SlowCheetah.
I recently created and deployed an Azure WebJob to multiple environments for one of my clients. When I deployed to new environments, my WebJob would reference the wrong Database and Storage Accounts. I eventually discovered that the App.Config files were not being transformed by FTP’ing into the VM that hosted the WebJob and inspecting the deployed App.Config file. I tried to place the connection string values in the Azure Portal Application Settings Blade for the WebJob but this did not work either.
I ended up just creating multiple sections in my App.Config file and just manually commenting/uncommenting out the relevant values when deploying to a new environment.
Finally, as I mentioned earlier, when I deployed my WebJob to Azure, I had to set the Storage Account connection strings in the Web App Application Settings connection string section to get the WebJob to run. In my experience, as long as you have the correct values set in the web.config or app.config that is deployed to the server, the application would run fine. WebJobs are the first Azure Apps where I had to explicitly set values in the Web App’s Application settings connection string section.