In part 3 and final blog post of this series, I want to go into more detail about the ASP.Net Web API and the Windows Console Application that I wrote to help me complete the project of replacing my Wordpress blog with a custom Angular 2 application. In you have not read part 2 of this series, you can find it here.
The Back-End
The ASP.Net Web API that I created to serve as the back-end for this project is pretty straightforward. Its main function is to:
- Provide Post, Category, Archive and Inspirational Quote data
- Provide server side pagination functionality
- Provide search functionality
When the Web API loads on Application Start it does the following:
- Creates a singleton object called BlogContext via a static class called BlogContextManager
- The BlogContext then loads categories, post-summaries, quotes and tags json files into memory
- The BlogContext will also pull in the full blog posts, located in (.html) files into memory as well
Json Files
categories.json - The categories json file contains all of the categories I have used for my blog.
quotes.json - The quotes json file contains a list of inspirational quotes and the date I added the quote. The Web API will will only serve 1 quote and it will be the most recent date.
tags.json - The tags json file contains all of the tags that I have used for my blog entries.
post-summaries - The post-summaries json file is the main json file that consist of the following fields:
      {
        "id": int,
        "title": string,
        "author": string,
        "postDate": string,
        "snippet": string,
        "link": string,
        "isActive": boolean,
        "categories": [],
        "tags": [],
        "images": [],
        "canPreview": boolean,
        "previewExpirationDate": date
      }
Most of the fields are self-explanatory. The snippet field contains a small snippet of what the post is about. As I type this, I think a better name for this field would have been “description”. The link field contains the name fo the physical (.html) file that contains the full post. I didn’t put the full html in this json file because I didn’t want to bring all of the data down when it was the full post was only going to be seen on the Post page. Also, I didn’t particular good about putting html in json.
The canPreview and previewExpirationDate controls if a blog post can be previewed if it is not active and when the preview expires.
I want to also note that for every back-end object, I had matching TypeScript classes on the client side and used strongly-typed RxJS Observables when retrieving data from the Web API.
gc-cli
The gc-cli Windows Console Application originally started off as a WinForms Application. I needed a tool to generate Sitemap xml files. The tool started to grow when I put functionality in it to generate a RSS xml file and static html pages. I am a huge fan of the command line, in particular Bash, so I decided to move all of this functionality to a Windows Console Application. The Windows Console Application used the same C# libraries that the Web API uses to load data, so a lot of work was saved.
gc-cli has an app.config file with these configurable values:
      <appSettings>
        <!--DEV-->
        <add key="DevDomain" value=""/>
        <add key="DevJsonConfigDirectory" value=""/>
        <add key="DevOutputDirectory" value=""/>
        <add key="DevAngularCLISrctDirectory" value=""/>
        <!--PROD-->
        <add key="ProdDomain" value=""/>
        <add key="ProdJsonConfigDirectory" value=""/>
        <add key="ProdOutputDirectory" value=""/>
        <add key="ProdAngularCLISrctDirectory" value=""/>
      </appSettings>
[Dev/Prod]Domain - value is used to specify the url that will be used for image and the static html paths in the Sitemaps, RSS xml and static html files.
[Dev/Prod]JsonConfigDirectory - value is used to specify the directory of the json files
[Dev/Prod]OutputDirectory - value is used to specify where gc-cli should output the Sitemaps, RSS and static html files
[Dev/Prod]AngularCLISrcDirectory - value used to specify the angular-cli default src directory. This directory is needed so the static html files can be placed in a sub directory and the .angular-cli.json config file can include them in the “dist” folder, which contains your deployable front-end artifacts.
Basically, how gc-cli works is that I first added an entry to my Windows Path to the gc-cli executable, so I could type commands in Bash. Next, I type:
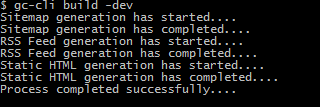
gc-cli build -dev
Or
gc-cli build -prod
gc-cli will then pull the appropriate values in the app.config and generate the Sitemaps, RSS xml and static html files. The output in Bash looks like the below:
The “Shadow” Blog
I am not an expert on SEO and really never gave much thought to it because the Yoast SEO Wordpress plugin handled all of this. Now that I was removing Wordpress from the equation, I have to give a lot more thought to Search Engine Optimization. What I quickly found out is that Single Page Applications don’t work very well with Social Media Share Buttons. I was dynamically setting the meta tags using the Angular 2 Library @nglibs/meta but the share buttons would only use the tags that were hardcoded into the index.html.
Ultimately, after discussing this issue with a friend and doing some research on the web, I elected to generate a slimmed down, static html file for every post. The static html files would have their meta tags set with data from the BlogContext, have the Social Media Share Buttons and on the Angular 2 pages, the url that the Social Media Share Buttons used in the querystring were the static html pages, so the Social Media sites could grab the correct meta tags.
The static html files use the same header and footer as their Angular 2 equivalents, but I elected to not put the search, categories, inspirational quotes and archives on it. I believe if people like my content, they will just click on the header links to navigate to the full Angular 2 site.
The Deployment Process
My deployment process is pretty simple.
- In Visual Studio 2015, right-click on the Web API project and Publish to a local directory
- In Bash, type in “gc-cli build -prod” to generate the Sitemap, RSS xml and static html files
- In Bash, type “ng serve” to get angular-cli to produce the front-end deployable artifacts
- Upload these files to the application server
If I need to add a new blog entry, I just update the categories, tags and post-summaries json files. I then run gc-cli and then upload the updated json, Sitemap, RSS and static html files to the application server.
Enhancements!
As with all Software Development projects, there are always features that you can add or enhance.
Blog Monitor
In a previous post, I alluded to the fact that I use a shared hosting service with GoDaddy. I believe Godaddy has set the IIS Regular time intervals (in minutes) setting to single digits, forcing the App Pool to recycle frequently and causing the Web API to reload the data into memory several times. I created an object that I called the “BlogMonitor” that is configured to call the Web API in specified intervals to prevent the App Pool from shutting down. I may completely remove this feature or I might configured it to call the Angular 2 client as well.
Re-load Data Per Request in Development
Because the Web API loads the blog data on start up, if I am making changes to the blog and I want to see the changes, I have to stop the Web API and re-run it to load the changes. I may configure the Web API to load data per request in Development, so I don’t have to stop/start the Web API during Development. If I do implement this functionality, it will use an HttpModule.
Comments Section
When I was using Wordpress, I was using Disqus to manage my comments section. I have not decided if I am going to have a comments section on my Angular 2 blog. If I do decide to have a comments section, I will probably just use Facebook’s Comment Plugin.
Conclusion
This concludes my 3 part series on replacing my Wordpress blog with Angular 2 and ASP.Net Web API. I really enjoyed the “struggle” of learning more about Angular 2 and I am very satisfied with the end results. You can find the code on GitHub here