
A few weeks ago I decided to upgrade Grenitausconsulting.com to Angular 2 using angular-cli. In this post, I want to talk about the trials and tribulations I went through to complete this small project.
Tools I used!
- angular-cli
- Git
- GitHub
- Latest version of Nodejs
- Latest version of Node Package Manager
- Latest Version of TypeScript
- Visual Studio 2015
The Project
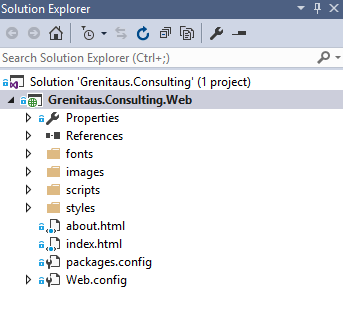
I created Grenitausconsulting.com a few months ago and it is nothing more than static HTML pages. I used Visual Studio 2015 to create and the deploy the code to my web server. It contains a few static HTML pages, images, style sheets and some JavaScript files. I figured this would be a perfect project to continue to sharpen my Angular 2 skills.
Here is a picture of the folder structure of the static HTML solution in Visual Studio 2015:
The HTML pages are very simple and have repeating header and footer HTML in every page. In Angular 2, you break everything down into “components” to make them easier to test and to make the entire project less monolithic. After giving it some thought, here is a diagram of the components I wanted in my Angular 2 project: 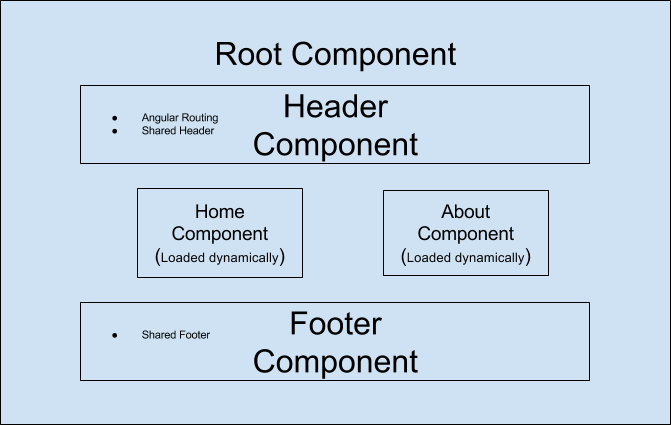
Angular CLI
In one my blog posts, I talked about how to setup an Angular 2 Project using the official Angular 2 Quickstart Guide. For this project, I wanted to use the angular-cli tool, which you can find here to help me setup a base Angular 2 template and to help me deploy the application after I completed development.
In Git Bash, I navigated to a temporary directory and I typed the following command to create my base Angular 2 project:
ng new GrenitausConsulting
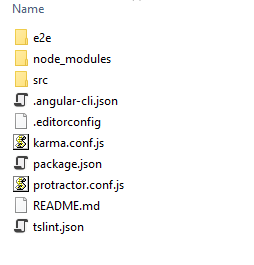
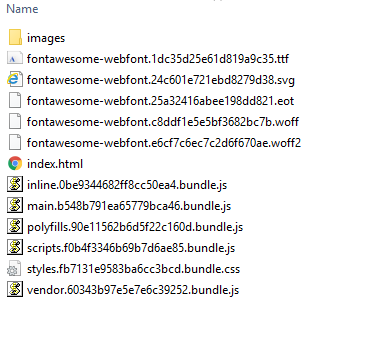
This command can take some time but after it finishes completing, it would make a base Angular 2 folder structure for me to start using. The –skip-git parameter is used to tell angular-cli not to run the “git init” command since I will be copying the project files to an existing GitHub repository that has the existing Grenitaus Consulting codebase. Here is a picture of the folder structure that angular-cli creates:
Visual Studio 2015
Now that I had my Angular 2 folder structure courtesy of angular-cli, I navigated to my Grenitaus Consulting GitHub repository and created a new Git branch:
git checkout -b angular-2
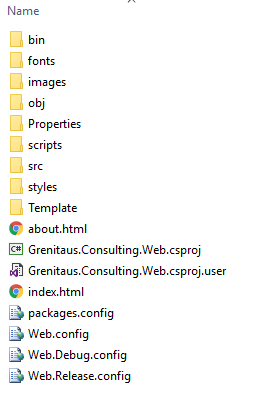
The Grenitaus Consulting codebase is an ASP.Net MVC 5 empty project and the start up page for the project is set to index.html. I then opened up my Grenitaus Consulting project in Visual Studio 2015. I then copied my entire repository to a temporary location so I would have access to all the existing HTML, images, JavaScript and style sheets. Here is what my static HTML folder structure looked like:
Now that I had a backup of my existing site, in my Visual Studio solution, I choose to show all files in the Solution Explorer and I deleted all the contents except for the following:
- bin folder
- obj folder
- the “.csprojc” file
- packages.config
- all the “.config” filess
After I did this, I went back to the temporary GrenitausConsulting folder that angular-cli created for me and copied all of its files to the folder where my ASP.Net MVC 5 project file (.csproj) is located and compiled the solution to ensure it would compile without any TypeScript errors. I also went into the tsconfig.json and removed the “outDir” value and added “compileOnSave: true”. In the Solution Explorer, I right-clicked and included the following files and folders in the project:
- src
- angular-cli.json
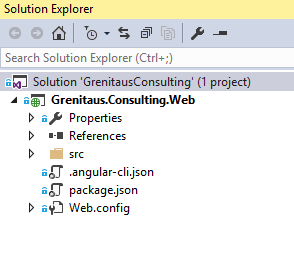
Here is what my project in Visual Studio 2015 looked like after I was finished:
Next, I wanted to ensure that angular-cli could build a distribution folder without errors. One of the great things about angular-cli is not only does it build you a base Angular 2 Project structure, you can view your changes in the browser (which I will talk about later) and it will build a distribution folder that you can then use to deploy to a Test or Production Web Server. If angular-cli cannot create this folder, it will display in red letters some of the problems it encountered.
In Git Bash, I navigated to where the “.csproj” file is located and typed the following command:
ng build -prod
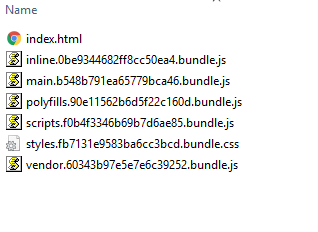
By default, if the command is able to complete without errors, it will create a folder called “dist” and you can then literally copy the contents of this folder to any Web Server and your application will be up and running. Here is the output from the command and what my dist folder looks like: 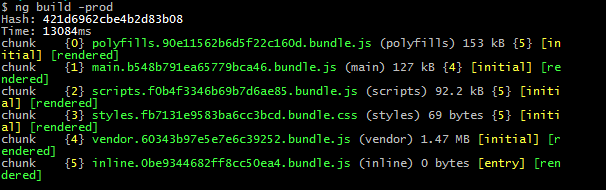
Now that I know that angular-cli can build my distribution artifacts, I wanted to ensure that the Angular 2 base application could run in the browser with no issues. So I typed the following command in Git Bash:
ng serve
This command starts a lightweight Web Server on your machine and will host the application at http://localhost:4200. According to the Interwebz, it is supposed to launch a browser window for you but I had to open up a browser and navigate to the location manually. Here is what angular-cli displays when it is running the Web Server: 
When you navigate to http:/localhost:4200, you should see a default message “app works!”.
Tip: - Pressing ctrl + z in Git Bash stops the Web Server.
Angular 2
Now that I knew my base Angular 2 application could be compiled to a distribution folder and it could run successfully, it was time to actually start converting the application to Angular 2.
The static HTML pages shared the same background image, so I elected to put this HTML in the app.component.html file.
As I stated, the static HTML project had repeating HTML in the index.html and about.html pages. So the first thing I had to do is create components for the header and footer. Since the footer only had external links to Social Media, I elected to do this first. So I typed the following in Git Bash:
ng g component footer
This angular-cli command will create a sub-directory in the app folder called footer. It will create the following:
- header.component.css
- header.component.html
- header.component.spec.ts
- header.component.ts
In Angular 2, components can have their own style sheets, HTML template, specs for testing and of course, the TypeScript file. I will be using the existing global style sheets and there is no code to test, so I won’t be using the style sheet and spec file but decided to leave them in the folder.
What’s great about angular-cli is that not only has it created all of the files I need for a new component, it has automatically included the new component in the root module, app.module.ts, which you can see here:
    import { FooterComponent } from './footer/footer.component';


    @NgModule({
      declarations: [
        AppComponent,
        FooterComponent
      ],
      imports: [
        BrowserModule,
        FormsModule,
          HttpModule,
      ],
      providers: [],
      bootstrap: [AppComponent]
    })
After this was completed, in the app.component.html file, I placed the footer.component selector “app-footer” at the bottom:
<app-footer></app-footer>
After this, I decided to make my home component. This would be the default page that has an overview of all of things I can offer for a client. Repeating the steps that I used to create the footer component, I typed the same exact command into Git Bash but changed the component name to “home”. I then opened up the static index.html page in my old solution and copied the HTML needed for the home component into home.component.html.
Also, it is important to note, as I am making these changes, I am ensuring the application compiles, that the distribution folder can still be made without errors and that I can load the application in the browser.
Similar to the home.component, I created the about.component. This component displays a summary of my experience and background. After this component is created, I opened the about.html page in my old project and copied the HTML contents to about.component.html.
Next, I had to make the header component. The header contains navigation links to home, about and an external link to my blog. So first, I decided to make a new module for routing. You do this by typing into Git Bash:
ng g module app-routing
This command will create a sub-directory under app called “app-routing” and create a file called app-routing.module.ts. I then imported all the necessary modules, components and configured all of the routes. Below is the completed app-routing.module.ts:
    import { NgModule } from '@angular/core';
    import { RouterModule, Routes } from '@angular/router';
    import { AboutComponent } from '../about/about.component';
    import { HomeComponent } from '../home/home.component';

    const routes: Routes = [
        { path: '', redirectTo: '/home', pathMatch: 'full' },
        { path: 'home', component: HomeComponent },
        { path: 'about', component: AboutComponent }
    ];
    @NgModule({
        imports: [RouterModule.forRoot(routes)],
        exports: [RouterModule]
    })
    export class AppRoutingModule { }
Also note that this module will not be automatically imported to the root module for you by angular-cli. You will have to manually import this module into the root module.
Although it took some time to understand Angular 2 routing, I was able to create my header component. Here is the completed header.component.html:
    <div class="bgded overlay" style="background-image:url('images/backgrounds/header.jpeg');">
        <div class="wrapper row1">
            <header id="header" class="hoc clear">
                <div id="logo" class="fl_left">
                    <h1><a routerLink="/home" routerLinkActive="active">Grenitaus Consulting, LLC</a></h1>
                </div>
                <nav id="mainav" class="fl_right">
                    <ul class="clear">
                        <!--http://stackoverflow.com/questions/34323480/in-angular-2-how-do-you-determine-the-active-route-->
                        <li [routerLinkActive]="['active']"><a routerLink="/home" routerLinkActive="active">Home</a></li>
                        <li><a href="http://Blog.Michaeldeongreen.com">Blog</a></li>
                        <li [routerLinkActive]="['active']"><a routerLink="/about" routerLinkActive="active">About Us</a></li>
                    </ul>
                </nav>
            </header>
        </div>
        <div id="pageintro" class="hoc clear">
            <article>
                <h1 class="heading">Technology Consultancy</h1>
                <p>Consultant, Blogger, Technologist and Very Passionate.</p>
            </article>
        </div>
    </div>
I will talk about how to handle existing css, JavaScript and images in angular-cli later but the part that was not intuitive was how to display the active link for the active page. As usual, Stackoverflow.com was able to provide a solution and I have put the link in comments above.
Now that the header component has been created, I needed to update the app.component.html file with the selector that angular-cli generated for the component. You can find the selector for each component in their TypeScript file. I also have to add the Angular 2 “router-outlet” tag to this file as well. The router-outlet tag was not very intuitive to me either. At first, I had no idea what it did but after doing research, it basically is a placeholder for the Angular 2 Framework to swap out components based upon the routing that you set up, in my case, in app-routing.module.ts. Here is my completed app.component.html:
    <app-header></app-header>
    <router-outlet></router-outlet>
    <div class="wrapper coloured overlay bgded" style="background-image:url('images/backgrounds/separator.jpeg');">
        <article class="hoc cta clear"></article>
    </div>
    <app-footer></app-footer>
Clean Up!
I had existing fonts, style sheets, JavaScript and images from the static HTML project. Inside of the “src” directory that angular-cli created, I created the following files and folders:
- scripts folder - I placed 3 existing JavaScript files in this directoryfonts folder** - I placed all of the font files inside of this directory **images folder - I placed all of the images inside of this directory
For the existing style sheets, I had 3 of them. layout.css, framework.css and fontawesome-4.6.3.min.css. layout.css imported the other 2 style sheets inside of it, so what I did is I copied the contents of layout.css inside the styles.css file that angular-cli created. I then copied the other 2 style sheets to the src root folder. Admittedly, I had issues trying to put these 2 style sheets in their own “styles” directory. Angular-cli would throw errors when I attempted to do this and create the distribution folder.
The fontawesome-4.6.3.min.css referenced fonts, so the relative url had to be changed to reflect the new location of the “fonts” directory. After this, I went to every component template that referenced an image and updated the relative url path.
The angular-cli tool creates a file called “.angular-cli.json” and I believe this file controls how angular-cli is configured. You have to modify this file to make angular-cli aware of any extra style sheets, JavaScript and images. I am not certain as to why you don’t have to tell it about fonts but that is a task for another day.
In the .angular-cli.json file, there is a section called “apps” and underneath this section, there is “assets”. Here I had to put a entry for the images folder:
          "assets": [
            "assets", "images"
          ]
After this was done, underneath “apps”, there is a section called “scripts”. I had to add an entry for each of the 3 external JavaScript files that are used in the application. I tried to do a wildcard but angular-cli wouldn’t complile, so I just added the 3 entries. You can see them here:
"scripts": [ "scripts/jquery.min.js", "scripts/jquery.backtotop.js", "scripts/jquery.mobilemenu.js" ],
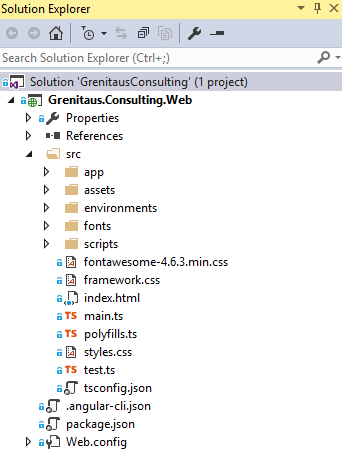
After I completed all of the clean up tasks, I was able to build the distribution folder and compile and run the application locally. Below is the final structure in Solution Explorer and the output of the “dist” folder after running “ng build -prod”:
After building the “dist” artifacts for the last time, I literally FTP’ed all of the contents of this folder to my Web Server and I am proud to say that I have deployed my first Angular 2 project to Production.
Final Thoughts
First and foremost, I believe that the learning curve for Angular 2 is very high. For a very simple conversion project, it took me quite a while to complete the project. I had to learn angular-cli, .angular-cli.json and how to retrofit existing images, fonts, JavaScript and style sheets into my new application. However, I am still fairly new to Angular 2 and its entire ecosystem, so it is natural that simple tasks take time to complete.
However, I believe as I gain more exposure to Angular 2, the tools and the ecosystem, I will become more efficient when working with the framework. The main concern I have is that as of now, the angular-cli tool is in beta and that in the near future, a lot of the subjects I discussed in this blog will be obsolete and there will be breaking changes.
I really enjoyed how angular-cli was able to generate a base Angular 2 project file, a development server, easily create Angular 2 artifacts and just as important, with a type of a command, generate artifacts ready for Production.
This leads me to my next point. Visual Studio, a tool I have used my entire career was relegated to “back seat” status. If you think about the process I outlined, Visual Studio 2015 only served as a tool to ensure that I had no TypeScript syntax errors and for intellisense. When I first started working with angular-cli, I tried to put all of the files in the “root” directory, instead the default “src” directory by leaving the “–source-dir” empty when I executed the command “ng new GrenitausConsulting –source-dir”. I did this because Visual Studio needed the “app” directory that is underneath “src” in the same directory as the “.csproj” file to be able to run the application and all of the relative paths to images, fonts and style sheets would work.
From some reason, when I created a new project using angular-cli with all the files in one directory, when I executed “ng build -prod”, there were some errors that I was not able to figure out. I just assumed that you had to place the source files in a different directory and that the Angular 2 Team had there reasons for doing this.
I will even admit, before I understood the “ng serve” command, I attempted to open up the base Angular 2 project created by angular-cli in Visual Studio Code. I haven’t used Visual Studio Code in months and I am still not very familiar with the IDE, so after a few minutes of trying to launch the application in Visual Studio Code and failing, I quickly searched for other options and found out about “ng serve”.
Overall, although I got incredibly frustrated at times, this was a very enjoyable and valuable learning experience. I was able to deploy my first Angular 2 application to a Production environment and I learned a lot more about angular-cli.
You can find the GrenitausConsulting repository on GitHub here. The Angular 2 conversion is in the master branch and the legacy static HTML projects is located in the static-html branch.
After I completed this project, I took on an even more ambitious project, which was to ditch my Wordpress blog in favor of a custom Angular 2 solution. I will be blogging about my experiences very soon!