I recently converted my custom written blogging software from ASP.Net WebAPI to ASP.Net Core 2.0. I also converted the gc-cli tool from the .NetFramework to .Net Core 2.0. In a 3 part series, I wrote about how I wrote my blog in Angular 4 and ASP.Net WebAPI. When I first wrote my blog, I only set up the ASP.Net WebAPI solution (.sln) for Continuous Integration in TeamCity, as opposed to the combined solution (.sln), which contains the gc-cli, ASP.Net WebAPI and Angular 4 client components.
Once I converted the backend and gc-cli to .Net Core 2.0, I noticed that my TeamCity project failed. I obviously needed to fix this issue but also, I wanted to use the combined solution (.sln) so that the gc-cli and Angular 4 client components would build, along with the ASP.Net Core 2.0 backend. I decided to write a very short guide on how I accomplished this task.
Caveat!
This blog entry assumes:
- You are already familiar with TeamCity
- You already have a TeamCity Server version 2017.1+ up and running
- You are familiar with Angular 2+
- You are familiar with ASP.Net Core 2.0
- You are familiar with dotnet-cli
- You are familiar with GitHub
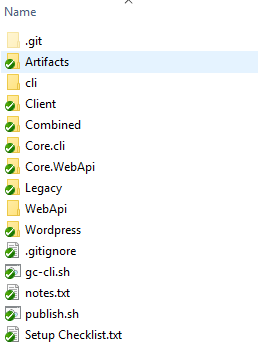
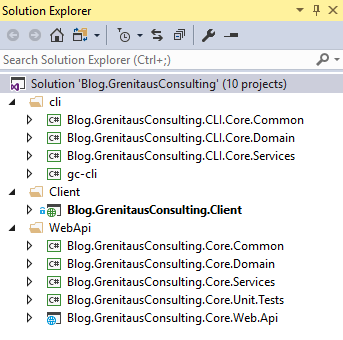
My Project Structure!
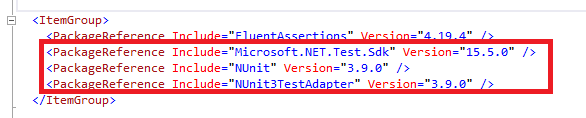
Install Test Packages!
Using a command line tool such as git bash or cmd.exe, navigate to the directory that contains your .Net Core 2.0 Unit Tests and install the following packages using the dotnet-cli “add package” parameter:
Install TeamCity Plugins
First, you will need to install the Node.js Build Runner, written by Eugene Petrenko. The GitHub location, the plugin and installation guide can be found here
Next, if you are using TeamCity 2017.1 or below, you will need to install the dotnet cli plugin. TeamCity versions 2017.2+ are bundled with this plugin. The GitHub location, the plugin and installation guide can be found here
Creating the TeamCity Project!
First, you will want to create a new TeamCity Project by going into Adminstration / Projects and pressing the “Create project” button.
You will then want to go to the new Project’s settings and setup the VCS Root, I am using GitHub.
After this, you will add a new Build Configuration for your Project and under Version Control Settings, press the “Attach VCS root” button and select the VCS you created under your new Project.
Next, you will want to start creating your Build Steps.
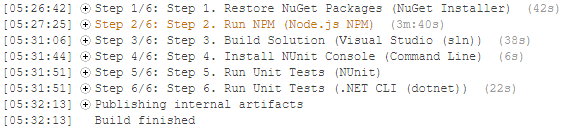
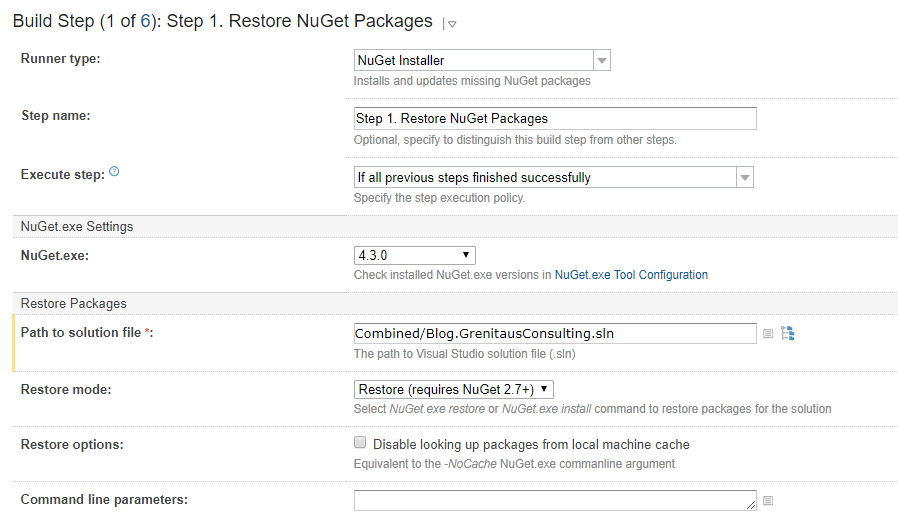
Step 1. - Restore NuGet Packages
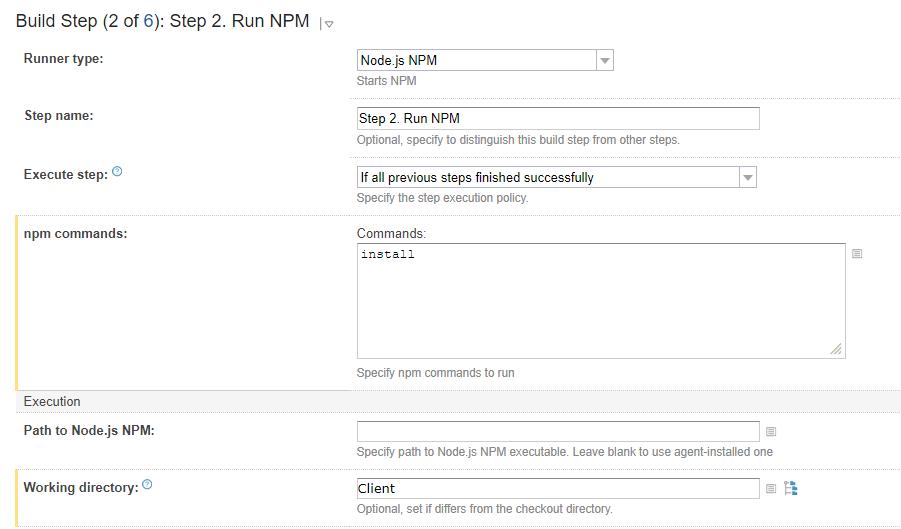
Step 2. - Run NPM (Node Package Manager). You will need this step to install the node modules your Angular 2+ application uses.
Step 3. - Build Solution

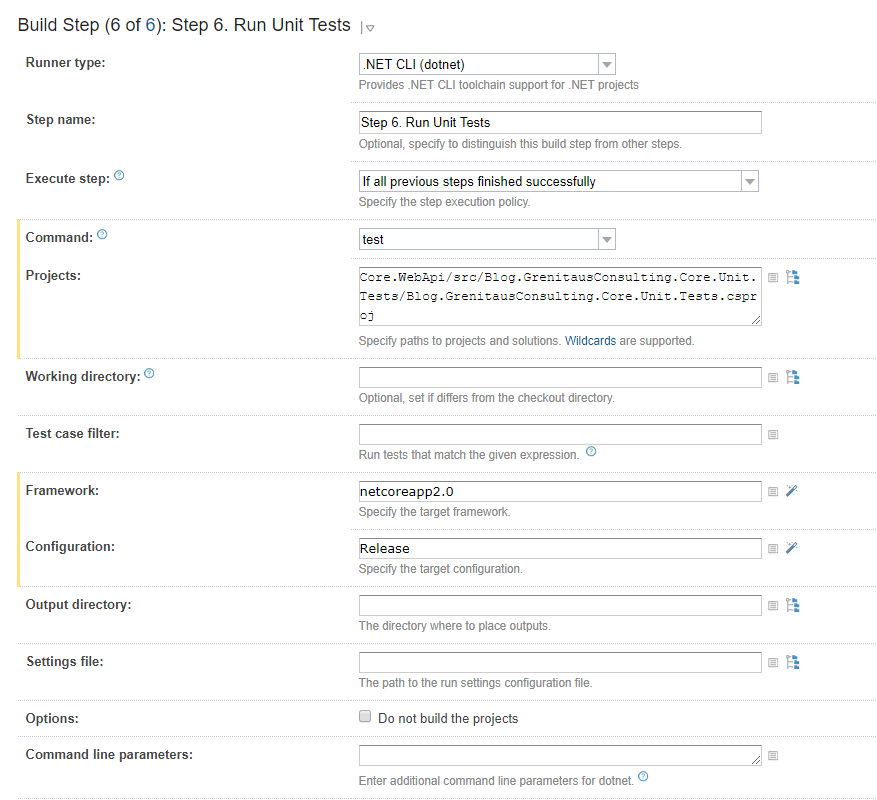
Step 4. - Run Unit Tests. In the “Projects” box, you will want to denote the location of the .Net Core 2.0 Unit Test project. Please note that I have a Step 4 and 5 to run .Net Framework Unit Tests, which is fairly straightforward and this is why the image states that it is Step 6 out of 6.
Last, you will either want to trigger a build by checking in a code change or just press the “run” button to do a manual build. The build and Unit Tests should run successfully.