At one of my clients, I recently had to learn how to deploy a .Net Console Application using TeamCity and Octopus Deploy. At the time, my experience with Octopus Deploy was fairly limited and I had only used the built in Step Templates. After doing some research, I noticed that there was not a lot of documentation on what Octopus Deploy Step Templates to use to deploy (execute) the Console Application. After figuring out how to do this task, I thought I would write a blog about it.
Caveat!
This blog entry assumes that you have a TeamCity and Octopus Deploy Server. Furthermore, I assume that you are familiar with GitHub, already know how to setup your project in TeamCity and how to use Octopack to push your project to your Octopus Deploy’s internal NuGet Feed.
Background!
At one of my clients, we started to collect data from a new source into our ecosystem. After a few Sprints of working on this effort, the Security Team stated that a portion of this data needed to be encrypted. The issue was that unencrypted data already existed in DEV, QA and UAT (the new features had not made it to Production yet) and once you implement encryption/decryption in the ecosystem, the ecosystem will assume that the data in the database is already encrypted, so when it tries to decrypt the data, you will get errors.
My client stated that they have handled this issue before by just creating a .Net Console Application that uses their custom encryption library to encrypt unencrypted data in the database prior to implementing encryption on the columns in the ecosystem. However, I was told that the Support Team no longer wanted to run these types of applications themselves and just wanted to use Octopus Deploy to execute the Console Application in each environment.
My main issues were:
- I had never deployed a Console Application using Octopus Deploy
- I didn’t know how to apply Octopus Deploy Variables and run the Console Application in a Octopus Deploy Step Template
Sample Code!
Before I discovered dotnetfiddle, I use to practice concepts using a Console Application. I added another entry to this existing Console Application that when it is executed, it will:
- Create a List of hardcoded Movies
- Convert the List to Json using Json.Net
- Grab a directory save path from the AppSettings Section of the App.config
- Save the json files to the directory specified in the App.Config
When I run the Console Application locally, it will save the json files to “C:\Temp\Local” and of course, when I deploy to Octopus Deploy, the directory location in the app.config will be replaced by a Octopus Deploy variable, the Console Application will be executed and the json files will be written to a different location based upon the Octopus Deploy Environment. You can find the GitHub Repository here
Brief TeamCity Project Overview!
Project Setup:

Project Build Configuration:
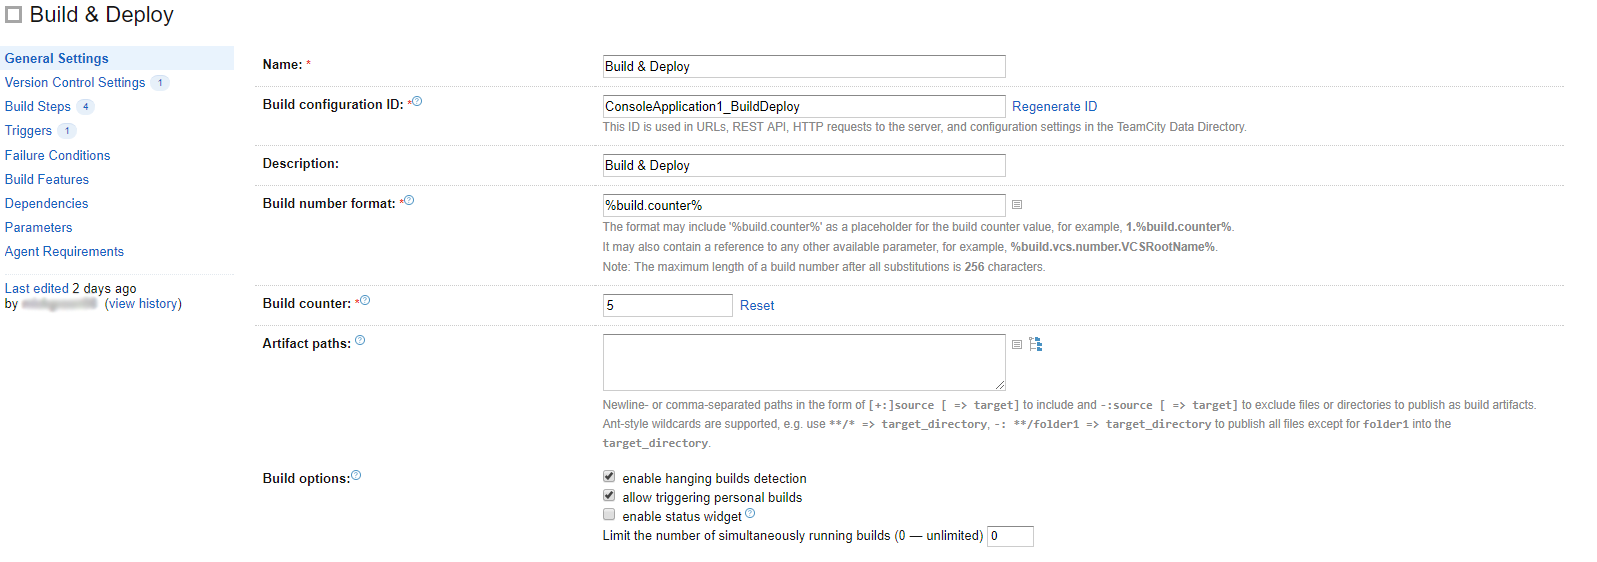
Project Build Configuration Steps:

Project Build Configuration Step to Create Octopus Deploy Package:
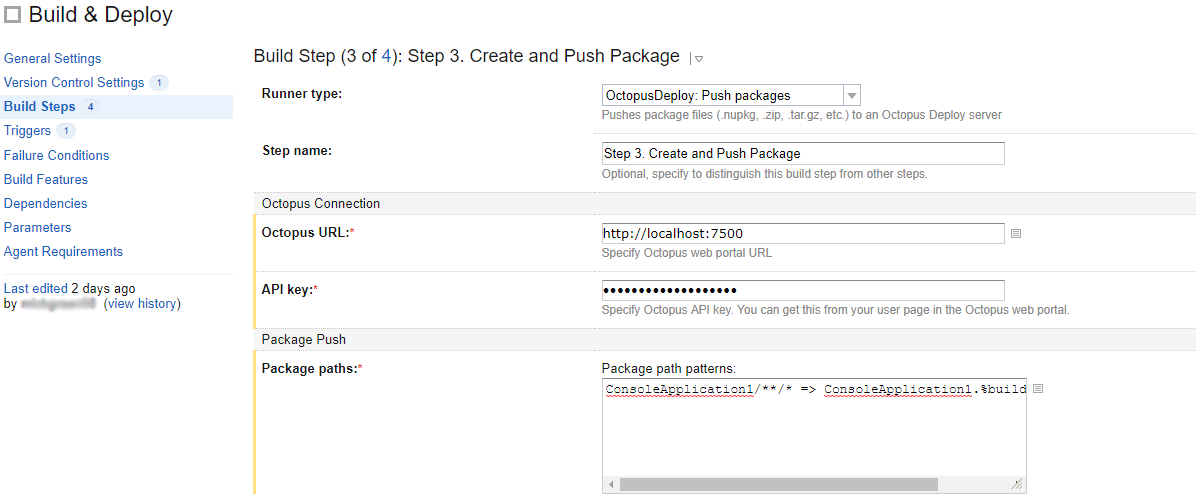
Package Path:
ConsoleApplication1/**/* => ConsoleApplication1.%build.number%.zip
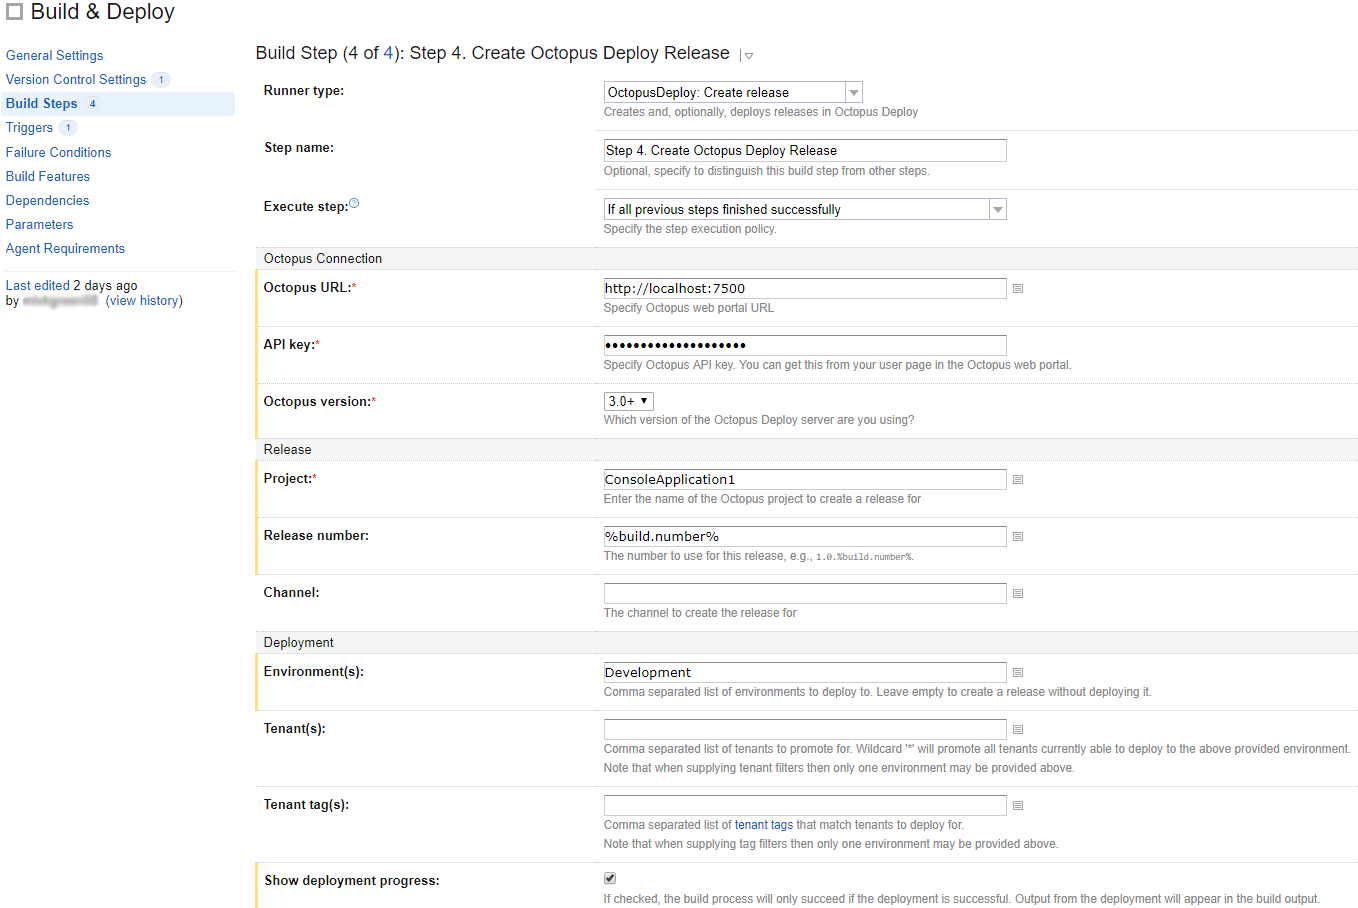
Project Build Configuration Step to Create Octopus Deploy Release:
Simple PowerShell Script!
To execute the Console Application in Octopus Deploy, I decided to write a very simple PowerShell script. The PowerShell script is called “deploy.ps1” and I had to place it in the “ConsoleApplication1” directory that contains the “.csproj” file. When I tried to place the PowerShell script in any of the sub folders, Octopus Deploy would complain about the script being placed in a sub folder.
Here is the script:
Start-Process -Wait bin\Release\ConsoleApplication1.exe
Octopus Deploy Overview!
Step 1 - Create a New Octopus Deploy Project:
I added a new Project in Octopus Deploy called ConsoleApplication1.
Step 2 - Add a Deploy a Package Step:
Under the Process option for the new Project, I chose “Add Step” and chose “Deploy a package”.
Below is how I configured the “Deploy a package” step:
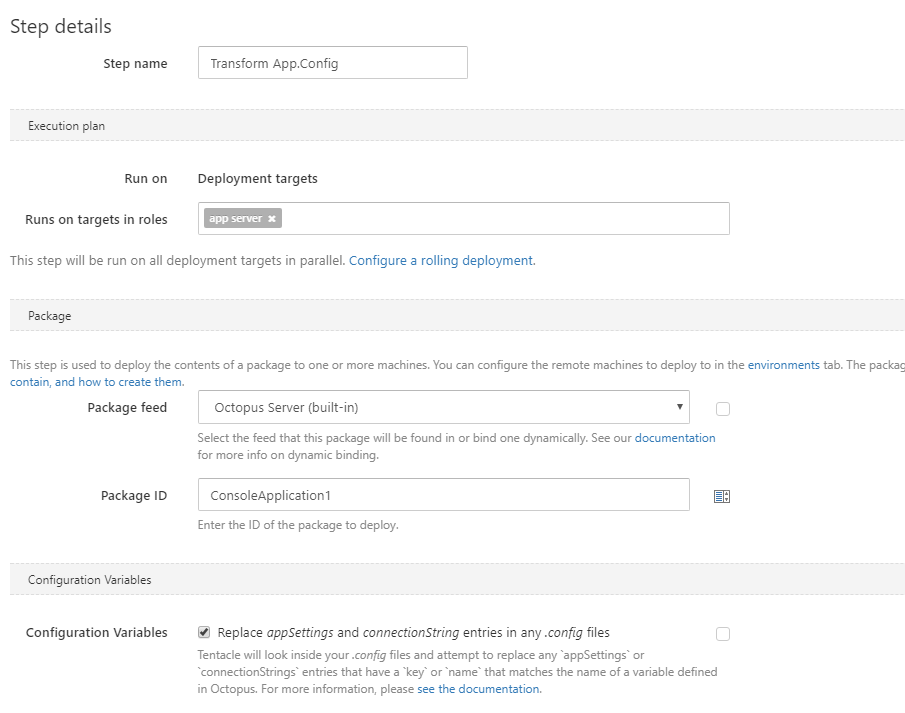
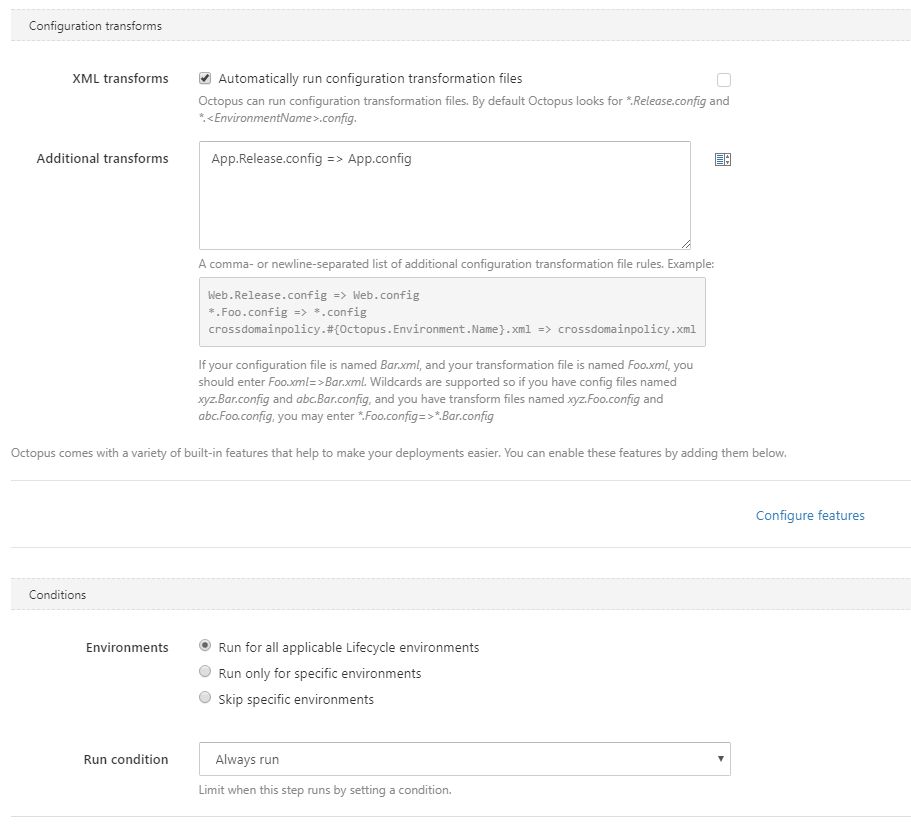
Step 3 - Add a Run a Script Step:
Next, under the Process option for the new Project, I again choose “Add Step” and chose “Run a Script”.
Below is how I configured the “Run a Script” step:
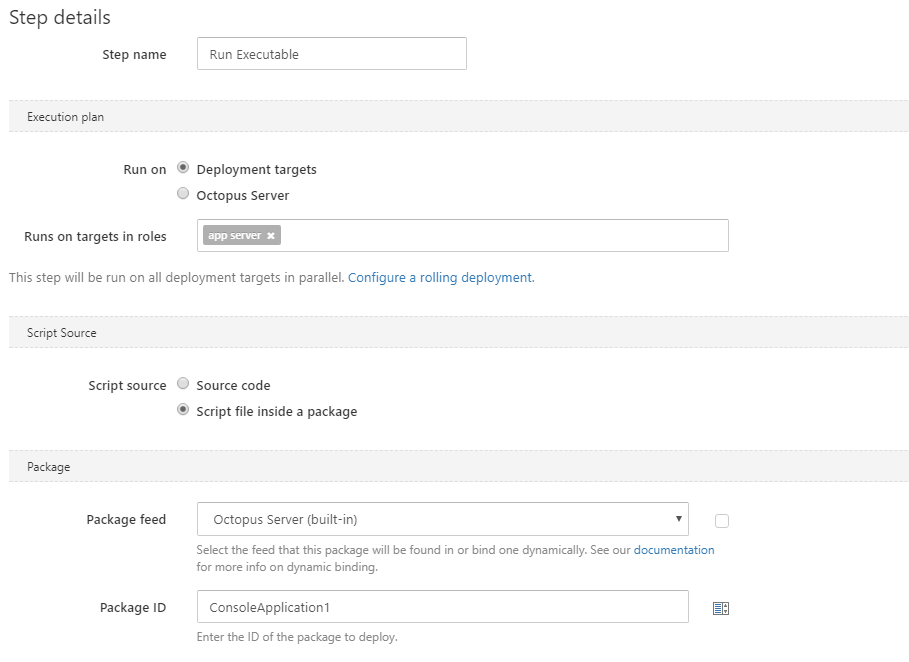
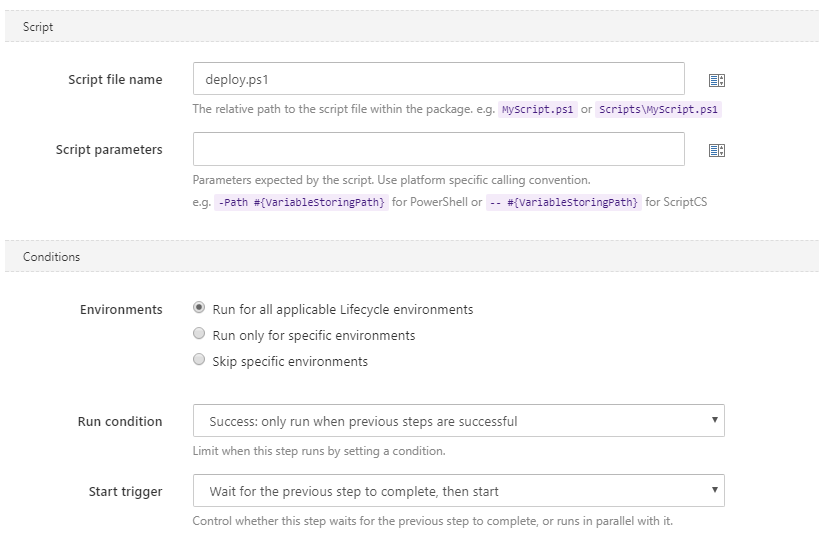
Here is what my Octopus Deploy Project Deployment Process looked like when I finished adding all of the steps:

Step 4 - Run the Project in TeamCity:
Now that we have setup TeamCity, Octopus Deploy and written our PowerShell script, it is time to run the ConsoleApplication1 project in TeamCity and see if all of this stuff works. To verify that everything works the following should occur:
- TeamCity Project should build, package and deploy the project to Octopus Deploy
- Octopus Deploy should receive the project and run it
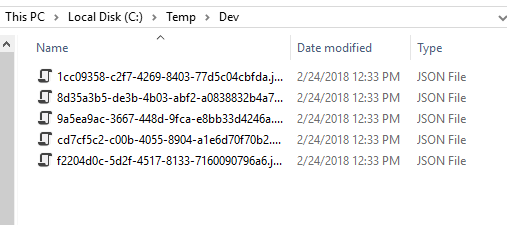
- In “C:\Temp\Dev”, we should see json files
TeamCity Build, Package and Deploy Results:

Octopus Package Received and Executed Results:

Json Files Created in the Dev Directory Results:
